
Today I have a little tutorial for a fun idea that I claim no credit in inventing!
We're probably all familiar with the concept of cut off shorts. Many of us wore them when we were younger, and I saw a pair just yesterday. You know the kind. Often born out of a pair of jeans with ratty knees, cut off and left to fray unceremoniously.
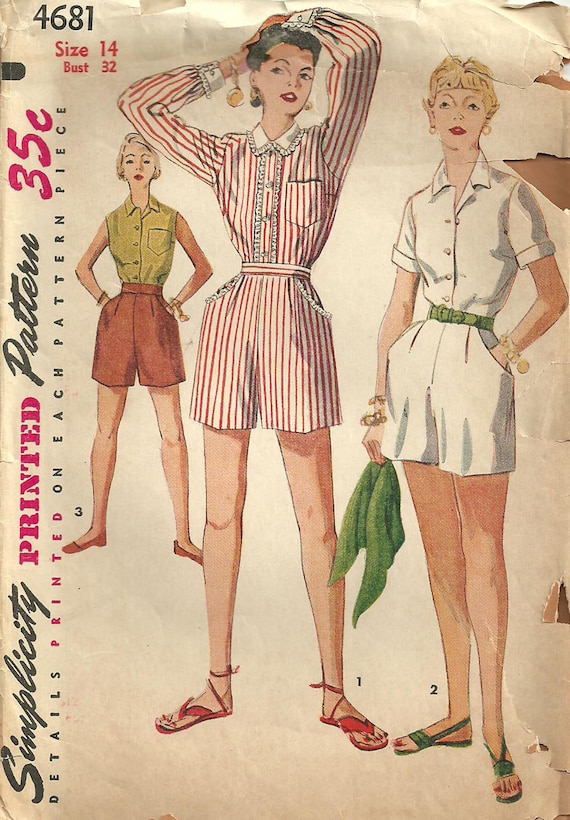
As I've mentioned before, I've been working up to the idea of wearing (and sewing) shorts for summer. The patterns I ordered from Wearing History arrived the other day, and I'm now just awaiting an order from Denver Fabrics so I can try my hand at shorts.
Anyway, the other day I was catching up on my blogs and couldn't believe it when I saw this post by Miriam of Kafferepet. Oh my goodness! I wasn't sure if they were the same jeans, but it looked like she cut the legs off a pair of Freddie's of Pinewoods jeans and turned them into shorts. Genius! (Update: Rueby pointed out in the comments that Freddie's actually sold these shorts at one point!) Coincidentally I had just the same style of Freddie's jeans myself. In fact, they were jeans that I never actually wore because the legs of that particular style were just too wide to be comfortable on me. this photo from VLV in 2009 shows about the only time I ever wore them. I always thought it was a shame because the pockets were so darn cute.

So, inspired by Miriam, I decided to restyle my forgotten jeans into shorts with a neat cuffed hem. It was a quick and easy project and suitable for sewists of any skill level. Because it requires very little actual sewing, you could even accomplish this without a sewing machine.
And what a great idea for vintage trousers that may have seen better days, don't you think? Or ones that fit great on top but leave something to be desired on the bottom, like ill-fitting legs or a stubborn stain? You can give them a new lease on life this summer! And if sewing up a pair of vintage shorts yourself is a bit over your head right now, why not try this shortcut to shorts?
With that, I offer you a little tutorial...
How to restyle a pair of vintage trousers into cuffed shorts
Supplies
- A pair of trousers, naturally! (I used a modern pair of 1950s-style utility jeans, but you could use any pair of high-waisted trousers.)
- Sewing machine or willingness to sew by hand
- Matching thread
- Optional: rayon seam binding, lace hem tape or bias tape
The process is fairly simple, but if you've never done a cuffed hem before you might want to practice a bit. Why not try it on the bottom of the trouser leg, since you won't be needing it any longer, anyway?
Now, you may not want a cuffed hem. If you don't, you're welcome to do whatever hem treatment you'd like! There are many examples of both cuffed and plainly hemmed shorts from the 30s through the 50s, so really both would be appropriate.
 {source: Etsy} |  {source: Quality Time} |
Preparing the trousers
1) Decide the finished length you'd like your shorts to be. As you know, vintage trousers have much longer rises than modern ones, so don't be surprised if you end up with a hemline that's only a couple of inches from the crotch but still results in shorts that are far from scandalously short. If you have another pair of shorts or a playsuit that's a length you like, lay them flat on a table and measure from the natural waist to the hemline. Since I had no other shorts for a comparison, I measured the length against a fantastic new playsuit I just got from Adeline's Attic.

In my case, the length from the waist to the hem was 14.5".
2) Lay your trousers out and mark with chalk or a pen that length down from the waist. (You may notice I actually decided to mark mine at 14". And pardon all the pet hair on these, I should have lint rolled them before!)

A word of caution: make sure the line where you'll want your hem is at least 2.5" lower than the bottom of the crotch of your trousers (longer if you choose a cuff deeper than 2"). Why? Take a look...

You'll be folding up a cuff, and you want to make sure there's room to fit the cuff in and not have too much fabric bunching up between your legs.
3) Decide how deep you'll want your cuff. I think 1.5" or 2" is about perfect for the right vintage look. I went with 1.5".
4) Keep in mind that the line you just marked will be the bottom of your hem/cuff. Multiply the depth of your cuff by 2. For me that was 1.5" x 2 = 3". Then add another inch or more for your seam allowance. Make a note of that number.
Now this is up to you how you'd like to approach this part. When I did mine I was a bit unsure about how I was going to treat the free edge on the inside so I tacked on about 2", knowing I could trim it down later. This is also a good idea if you are worried about your skills in this department. Erring on the side of having too much extra fabric means you won't accidentally end up with shorts that bare it all because you cut the seam allowance down too much and had to raise the hemline more than you anticipated. Later when you decide how to treat your inside seam, you can decide exactly how much fabric you'll need for the seam allowance. Something to keep in mind: folding bulky fabric sometimes eats a bit fabric more than you planned since each fold is so thick, another good reason to err on the side of caution here. My 2" seam allowance turned into about 1" after all the folding.
5) Measure down the leg from your initial marked line by the number you decided on in the previous step. (Sorry my ruler isn't quite aligned in this photo!) This bottom line will be your cut line.

6) Very carefully, line your trouser leg up so that you have the grain as straight as possible, and carry your chalk/pen marks all the way across the leg. Take your time with this—you don't want to end up with wonky cuffs! If you're really nervous, you could cut the legs several inches lower and then mark the line along your body or on a dress form, but frankly I think this way works just as well and takes a lot less time.
I had help with this step...

Here's my top line marked with chalk and pins, and the bottom just marked with chalk. Don't bother pinning the bottom line since you'll be cutting the legs off along this line momentarily.

7) Repeat steps 2 through 6 for the second leg.
8) When both legs are properly marked, cut the rest of the trouser legs off at the lowest marked lines.

Suddenly they're looking a lot more like shorts, aren't they?
Preparing the cuffs
You're now going to press the lines of your cuffs prior to sewing. If you find this section confusing, there are several tutorials online on how to do this, like this video. It should be said at this point that there are lots of ways to sew a cuffed hem, and I'm just showing you this one particular method. I'm not saying it's necessarily the best method nor the easiest, just one method I like. Feel free to do it any way you'd like! One of the reasons I like this way, however, is that I can precisely control the length of the inseam and cuff as I go, and I feel it's a good method for visual learners who like to "see" how things are coming together.
1) Fold the fabric to the inside of the leg along your upper marked line (this will eventually be the length of your shorts). I find this easiest to do with the shorts inside-out. If you used pins to mark this line, remove them once you are sure you have your fold line straight. Press this line. In my case I was using rather thick denim, so I carefully placed a few pins perpendicular to the hemline to help keep the fabric in check until I had it lightly pressed. Of course, don't press over the heads of your pins. That's why I have the heads facing away from the fold.

Remove the pins and press this line. You don't have to go crazy in the pressing department here, as this line is basically just used as a visual aid of where to fold up your cuff later on. You'll see how that works in a bit.
2) With the shorts still inside out, roll your cuff fabric down equal to the depth of your cuff. Since I wanted my cuff to be 1.5", I rolled the fabric 1.5" down. First I marked a line 1.5" down from my fold, then carefully and evenly rolled the fabric down to that line.

Once you've rolled the fabric to this line, press firmly. This is a good one to press really well as it will be the top of your cuff once the cuff is rolled up.

3) You now have both the top and bottom of your cuff pressed. Turn your shorts right side out, keeping the current fold you just pressed. It should all look something like this.

Press again on this line for good measure. You can now see what I meant about how that first line you pressed is mainly a visual aid, since in the next step you'll be folding the cuff up along this line (and thus folding the opposite way of the crease. If this bugs you, you could in theory do that first pressed line with the cuff towards the right side of the fabric instead of the inside.)
4) Now this step isn't exactly necessary, but I find it helpful. Carefully fold your cuff up along the first line you pressed. Press the cuff firmly. I found pressing the cuff in demin a bit difficult, but it was much easier with the use of a seam roll, especially around tight spots like the inside of the legs.

Finishing the cuffs
This is the probably the quickest part of the entire process! How you approach this is up to you, but here's what I did.
1) With the shorts inside out, unfold the cuff. Run a line of stitches at least 1/2" inside the cuff fold line, towards the free edge of the fabric. (I used about 1/4" which worked but is too close, I feel.) Just be sure to stay within the depth of your cuff. For example, if your cuff is going to be 1.5", don't sew 2" away from the fold, or you'll see line of stitches from the right side of the shorts above your cuff. I opted to run a second line inside the first line by 1/4" since as you'll see below, I left the free edge alone.
This step is kind of difficult to visualize, but hopefully this will help...

Because I was using thick denim, I knew I couldn't fold the free edge under without it being too bulky. So I just left it as-is (though trimmed close to the second line of stitches instead of how you see it above, of course). I know, how uncouth! Initially I was going to use seam binding on the edge but ended up slightly miscalculating how much extra fabric to leave after the cuff and where to run my line of stitching, so I just left it. (If you're wondering why I didn't pink the edge instead, my shears are getting dull and I thought cutting through denim might be the death of them.) If your fabric is thin enough you could turn the edge under. Regardless of the weight of your fabric, you could use lace or ribbon seam binding, or overlock or zigzag the edge. Basically you can do whatever you'd like. I'd probably use seam binding next time, sewing one edge to the free edge of the fabric and then sewing the other edge to the leg. Of course, all to be hidden behind the cuff.
2) Once your stitching is complete, you're ready to officially fold your cuff back up for good. Press the dickens out of it! Either with your sewing machine or by hand, tack down the cuff at each side seam with at least 4 or 5 stitches. This helps keep the cuff up. I did it by hand because I couldn't fit that much fabric under my presser foot. (Though I have a broken needle to prove I tried.)

That's it!
I love the look of folded up cuffs but they can have a tendency to be a bit unruly, especially with stubborn fabric. You may find that you need to press the cuffs periodically. Particularly in the back where you sit on the cuffs, something you obviously don't need to worry about with trousers.

And here's their first day out on the town this weekend as shorts, not to mention the first day my thighs have been in shorts in decades!

Along with my restyled shorts, I'm wearing a sheer vintage blouse from Etsy, earrings from my vintage-inspired earrings tutorial, vintage brooch that was a gift, Remix Veranda wedges and vintage bangles. Oh, and don't forget my new purse from our honeymoon.


No idea what I was doing here leaning towards the camera like a goof. But this is a pretty accurate shot of how messy my hair usually looks. LOL

Whoops, you can see one of those unruly cuffs that needs pressing again!

While still not completely used to the idea of showing this much leg, I am no longer afraid to wear shorts like I once was. Just in time, too... the heat index was 99° F when we took these photos on Saturday (ugh). I know I'll get lots more use out of these as shorts than I ever did as jeans! I already enjoyed wearing them all weekend.
A huge thanks again to Miriam (And Freddie's!) for the inspiration. I hope you all enjoyed this little restyle tutorial!

Tasha these are so darling! I think they were cute as pants, but as shorts they are stellar! Fantastic job and what a way to beat the heat. After reaching near 100 degree temps over the weekend here, I'm itching for more shorts. Lovely! xoxo, Sunni
ReplyDeleteWhy wouldn't you want to get your legs out? They're great! That's a great tutorial btw
ReplyDeleteCute!!! Love your half-moon mani, as well. I actually don't think I own a pair of shorts because it's so difficult to find flattering ones. Grrr. Might have to get the sewing machine out.
ReplyDeleteFabulous idea! Great outfit too :)
ReplyDeletePx
BRILLIANT. THose are truly the PERFECT shorts. You look amazing (as ever) and what a great tutorial. Thanks for sharing!
ReplyDeleteVery cute!!
ReplyDeleteSo cute! I love altering my old favs
ReplyDeleteFreddies sold the shorts Miriam was wearing - I went to take a look after I saw that post though and I guess they're done with them now! This is a great idea though! They look awesome :)
ReplyDeleteThanks guys!
ReplyDelete@Rueby... Ahhh, that would explain why I didn't see them on their site when I went to check and see if they did, indeed, make shorts and I hadn't noticed. Thanks for the update! :)
What sassy shorts! The timing of this is perfect as it was scorching hot here this weekend (90-100F) and one of those days I was doing garage work in jeans and totally melting. I was thinking I should make some shorts as well -- or maybe just make them out of some pants, now that I've seen this!
ReplyDelete@Moe Egads, I thought 100 was bad here, but at least we get that more frequently than you. You just must have felt like you were roasting in the oven! At least Sunday/Monday made up for the disgusting Saturday weather by cooling down to the low 80s.
ReplyDeleteGreat shorts!!! You look fab!! Love the handbag also, vey nice outfit!
ReplyDeleteI too just started wearing shorts, a bit intimitading but as I guess it's just a matter of being used to it (I hope), although I must admit it feels a bit naked ;) ...anyhow short are a great way to get those legs a bit tanned and that would be nice for a change....
have a great day! / Olivia (It's really hot here in sweden to btw ;) )
Fantastic effort with the restyling! They look super!! I Love the whole outfit! I really like the flouncy sleeves on that blouse, and the remixes of course, I'm very jealous of those! And the purse... :) x
ReplyDeleteSuper adorable. I'm also very excited for you to start making your own shorts from patterns. Its much easier then you think! I love making shorts and have added quite a few to my wardrobe as the temp. has been rising. I think I'm gonna need to try this out on my worn out Freddies jeans. Thanks for the idea.
ReplyDeletelilvintagehomemaker.blogspot.com
They look great! I'm going to try this. I love how detailed your tutorials are!
ReplyDeleteGreat tutorial you just are too adorable. I may try with the same pants as I just end up looking short and dumpy in my Freddies.
ReplyDeleteYou look ridiculously adorable in these photos, you're definitely rockin' those shorts! Sadly I'm not brave enough to wear shorts in public, hopefully some day if I have a pair as cute as these.
ReplyDeleteYour hair looks well styled too, how do you curl it? Hot sticks?
Great job! Nice legs. :)
ReplyDeleteLooove your purse!
Morning Tasha! I bookmarked this post yesterday, such a handy trick.
ReplyDeleteRegarding the satchels, I have the middle size and can just fit my DSLR in. As Franca said in the comments they are a bit narrow, so I don't think a big camera would fit into a smaller size bag. Hope that helps a bit, if it is any use I have been using mine all the time and it is such a useful bag. x
They look so great as shorts! Great tutorial too - really clear and easy to follow :)
ReplyDeleteYou look gorgeous, my goodness you have lovely legs :) you're looking really well I hope you enjoyed the Honeymoon! x
ReplyDeleteThose are just SO much cuter as shorts! Good job! :D
ReplyDeleteWow they look great!!! Very well done to you :D
ReplyDeleteSo cute! Greetings Annette
ReplyDeleteI'm a day late, but wanted to say I love your shorts redo! And may I say you look like a movie star in that outfit? :)
ReplyDeleteI keep meaning to make a pair of denim shorts, but like everything else that crowds my sewing list, I haven't gotten to it. I might go hunt around the racks of the thrift store to see if I can find something that may work...
Thank you so much for sharing the tutorial!
They turned out great!! Thank you for posting this tutorial! :D
ReplyDeleteThese are SO cute! I wish I wore shorts, haha. :D
ReplyDeleteThese look awesome! Hey, I have those pants in gray :)
ReplyDeleteThis was such a great idea. I was toying with turning a pair of trousers that are too short on me into shorts that I just HAD to do it after seeing your post. Thanks for the inspiration!
how adorable!! i love those pockets!
ReplyDeletehttp://inthehammockvintage.blogspot.com
Gorgeous!
ReplyDeleteFantastic tip...
You are so talented... Good job!
This is a fantastic result - a great pair of jeans into a darling pair of shorts! Following you:))
ReplyDelete