Friday, December 21, 2012

Reflections on my 2012 sewing and knitting

I'm actually feeling a bit more chipper and less cranky than I thought I would when I sat down to write this post, and I'll tell you why in a minute. 'Tis the season when everyone starts counting down their top whatevers of the year, and sewing projects, skills, goals and the like is no different. We've been getting ready to head to suburban Washington, D.C. for Christmas so I've had less time than usual for catching up on blogs, but I was inspired by the 2012 sewing reflections of Handmade Jane (edited to add, Lladybird Lauren posted hers shortly thereafter... holy cow!), so I thought I'd see what I did in 2012.

I didn't feel very productive at all this year. I sewed 3 dresses, 1 skirt and a pair of trousers. Which compared to many sewing bloggers is a drop in the bucket. But when I put it together with the three sweaters I knit, I'm actually feeling pretty good about the additions to the hand-made part of my wardrobe this year. And hence the relative chipper attitude. Considering I spent a lot of 2012 really bored with my clothes—not bored with vintage, just bored with my wardrobe—and was thus plagued with indecision on sewing and knitting, that's not half bad!


Let's briefly look at what I did manage to make this year, because in the end it all led me to some nice goals for 2013. Of course, I sewed and knit other things like accessories, but these were the big wardrobe pieces.


So neat and sweet jersey—I've always been rather indifferent to v-necks so I wasn't sure if I'd like this, but I wear it all the time! I think picking a light yellow was a good idea, because it's really become a wardrobe staple. It's probably the sweater I've worn more than any others I own this year. I can wear it plain, or with a blouse underneath, or even over a dress.


"No more sewing slump" dress—I look at the photo of this dress and wonder why I almost never wore this? I think maybe I decided it was a little too cutesy with the ruffled sleeve caps, but I don't know why I didn't at least wear it around the house, because it seems like it would be just dandy for days I work from home. I'm actually pretty proud of it still, since it featured a few things I'd never done before like a sweetheart neckline, buttons all the way up the back, a tie at the waist and lined pockets. I'll have to revisit this dress in spring and see what I think.


1944 apple picking dress—I love this dress. You even saw me wear it this fall. I am still crushing on that awesome fabric with the big allover print. This started a love for Japanese cotton, which I hope to obsess over more in the new year. The dress also featured some things I'd never done before, like a lapped zipper with a side seam pocket (and well, side seam pockets, period). It's a little big in the waist and the neckline is too low (shows my bra and/or slip every so often), but I love the shape and think I'd like to sew this pattern up again with a few tweaks.


Bias-cut green skirt—There is nothing exciting about this skirt, but that's what I wanted. Turns out I wear this quite a bit, even though every time I pull it out of the closet I wish I'd picked a slightly different shade of green as I always feel a little bit like an overgrown Girl Scout. I'll definitely sew this pattern again, although I recall I had some weird waistband length issues going on that I'll have to sort out.


Knit it in Flag Colors sweater—I finished up this WIP that I started two years ago! I haven't worn it much except to work, but I'm just so glad it's out of my knitting bins I don't even care.


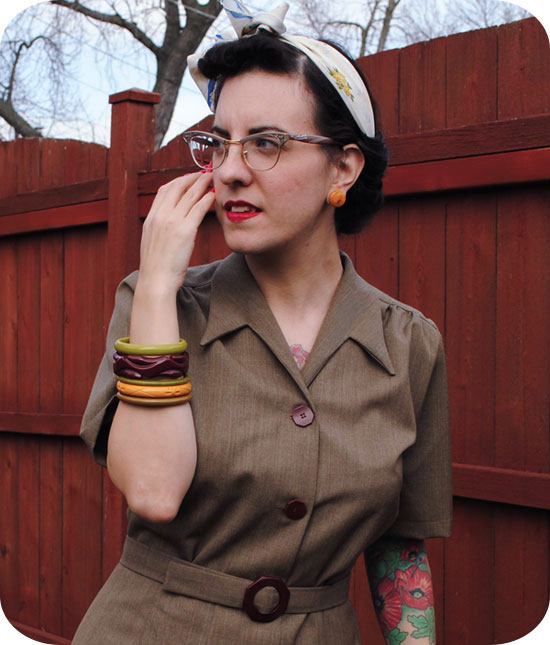
Wearing History Smooth Sailing trousers—I finally sewed pants! This was the only thing I sewed this year from a modern pattern, turns out. I made these with a chocolatey corduroy, and I love them. They have a couple of fit issues I'll try to iron out in the future. These trousers marked the tipping point for me to finally buy a serger, after binding all the seams. And that purchase was soooo worth it.


Red Queen pullover—Out of all the fair isle I feel I've knit this year, how I only accounted for one sweater is beyond me, but here it is. This was a complete revamping of a modern knit. I love this but don't wear it as much as I should because I really need to take the time to re-block the sleeves as I didn't block the forearms quite wide enough, so they're a tad tight.


Cake and vinegar dress—My second attempt (after the green skirt) to sew a "cake" piece for my wardrobe. While I am pleased with this dress, it's still pretty yawn-inducing to me and I was kind of meh about the outfits I put together for it when I was packing it to take to my mom's. It's too soon to tell if this will get a lot of wear or not.


Here are some things I've learned about what I made vs. what I wear vs. what I want to be wearing...
  1. I constantly open up my closet looking for blouses. Did I sew any this year? No. So I'm bored with the few vintage one that I continue to wear time and time again. Why didn't I sew any? I think I'm secretly still scared of collars, but collared blouses are my favorite to wear.
  2. I also open up my closet looking for skirts. But I sewed only one this year. I think I don't want to sew them because they'll feel boring, but there's loads of ways to make a skirt interesting, either in little sewing touches or how you style it.
  3. I have a ton of vintage summer dresses (more than I have anything else in my wardrobe), so I really don't have any business sewing more summer dresses, even though I sewed two this year. I also think #1 and #2 have shown me that even though I wear more dresses in the summer even, I think I may secretly like separates better. Or at the very least want more of them.
  4. Almost every time I put a cardigan on (either vintage or me-made) with a skirt or dress, I feel completely frumpy, with about 3 exceptions. All of these are cropped and hit at my waist or only slightly below—two vintage boleros and a vintage beaded cardigan. Now I know what I need to knit next year.
  5. I usually want to wear a cardigan but because of #4, end up wearing pullovers more often. I need to cool it on the pullover knitting next year.
  6. I've wanted to sew a slip all year but I have no clue what would be good fabric for one, so I haven't yet. I need to investigate this.
  7. I don't have a crinoline and thus sometimes avoid styles that would benefit from one. Hello, sew or buy a damn crinoline already. 
  8. I think I want to wear lots of solid colors, but in the end I do not. The things that make me the happiest? Color, patterns and prints. I'm focusing on that next year!

When I reflect on what I sewed and knit this year, only about half the pieces really fit into where I'd like to take my sewing and knitting next year. But each project had its own learning experiences, so I'm grateful for all of them. Considering life has had some learning curves this year with the first 8 months in our new house under our belt, I should feel pretty proud of what I have been able to accomplish. Even better, the fog of wardrobe ennui has been lifting in the past few days, and suddenly out of nowhere I feel invigorated and full of great ideas for 2013!

I may not get a chance to post again until after the new year, as we'll be out of town next week visiting family for Christmas. I'll still be on Twitter and Instagram, so you may catch me there. I'm so thankful for all the friends and connections I've made directly and indirectly from this blog, and look forward to even more exciting things in 2013.

I wish you all a joyful holiday season!!


Wednesday, December 12, 2012

Christmas crafting is in the air

Even though it barely feels like winter yet here, I've definitely been feeling the crafty Christmas spirit. Every year I have the best of intentions for a large variety of crafts I'd like to accomplish before the holidays. And most years, almost none of them get completed. That's certainly true this year, so I'm already plotting things I'd like to do for next year... maybe I'll actually get them done that way!

Fortunately I have managed to squeeze out a few small crafts, so I thought I'd share what I've been up to. These are projects I decided I wanted to do and then went on the hunt for tutorials where I needed help filling in the gaps. Most involved supplies around the house that I already had. The only thing I purchased was the drinking straws for the last project. How about that?

Hopefully my projects and those projects that inspired me will help inspire you this holiday season!


I love a good novelty print fabric, and I love gnomes. When my friend Elisa gave me a piece of fabric featuring mini gnomes, I knew it would have to become something fun for Christmas. My first idea was a small table runner for a side table, but then I thought why stop there?


  • less than 1/3 yard of cotton fabric
  • matching thread
  • scraps of quilt batting (if you don't have any, you can always use 2 or 3 layers of muslin or other cotton)
  • sewing machine

 
  1. I followed this tutorial for how to make quilted coasters. Mine are about 4.25" x 4.25". It really was simple, even the most beginning sewist could tackle these. I know nothing about quilting and was able to figure it out.
  2. I quilted each coaster, sewing concentric squares starting at the outer edge and working my way in. When I got towards the middle I was bored with squares, so I finished them off with an X.
  3. I made more. Four total, to be exact.
  4. I went a little crazy with one of them and used this tutorial for making mini pom poms with a fork, sewing little pom poms onto each end.
  5. I used this tutorial for how to make a mitered corner hem and made a small table runner with the rest of the fabric. (If you'd prefer, you could make cocktail napkins!)
  6. I walked around the house until I found a place for the runner. It fit our vintage Cosco bar cart perfectly!


Tutorials used to help me make these crafts:


I have always loved garlands of all kinds. Being a knitter there's no shortage of yarn in my house, so I grabbed up some reds, greens and sparkly white yarn and got to work. While I was at it I cooked up the idea to make pom poms for my hair, too. My initial idea was to make a bunch to put out during our Christmas party with a cute note telling people to feel free to take one to adorn themselves, too, though that never happened. (Feel free to steal my idea!)

 
  • yarn (I used fingering weight)
  • scrap cardboard or pom pom maker
  • wide-eyed needle
  • scissors
  • bobby pins

 
  1. I gathered up some holiday-colored yarns. You really don't need a lot of yarn. I used fingering weight, but heavier yarn will produce more full pom poms.
  2. I didn't have a pom pom maker so I used two pieces of scrap cardboard to make my own, using this tutorial.
  3. I cut a length of yarn and using a wide-eyed needle, strung up several pom poms through the center. If you knot each end of the strand of yarn, you can hook them over a nail, a mini command hook (thanks to my SIL for introducing me to these) or push pin.
  4. I adorned our doorways!
  5. As well as a few other things that looked like they needed pom poms, such as this vintage ornament. Because... well, just because.
  6. I wanted to adorn myself as well. So before cutting off the tying strands of yarn, I knotted them around the end of a bobby pin.


Tutorial used to help me make these crafts:


My mom always makes cheese flags for parties. I knew that I'd be doing that for our Christmas party, but I wanted to take it a step further and make flags for straws, too. I've seen this done a hundred times online, but I like my twist on it. It lets you remove the flags in case they don't get used (so you can create new ones next time!), and leaves a blank space for your guests to write their name. Like wine charms for cocktails.


  • heavy paper
  • color printer and editing software (or you could always draw them by hand!)
  • scissors or X-acto knife
  • drinking straws (Gray Goose is one place to order heavy duty paper straws like I used)
  • cocktail toothpicks
  • glue stick


  1. I decided what size I wanted my flag. After trial and error I settled on 5.5" by 0.75", and set it up in Photoshop, with a space big enough to write a name. When I was happy with it, I repeated it several times on the same sheet of paper and printed 2 sheets. I cut out each flag with an X-acto knife.
  2. I folded each flag in half around a straw, creasing it slightly along the edge where the arrow is pointing. This makes a little tube that you can slide the straw into later. (I wanted the flags removable.)
  3. I glued both sides together with a glue stick, leaving the tube open.
  4. I placed the flags (with tube sticking out) under a few heavy books to let the glue cure for a bit. (Otherwise it'll want to open back up.)
  5. When the glue was dry, I snipped out the ends.
  6. Of course I wanted cheese flags too, so I wrapped a few around cocktail toothpicks. (I did the writing on the computer.)
  7. And poked the flags into my cheese.
  8. I put some of the straw flags on straws, but left others in a dish with markers nearby for guests to write their name in the blank spot.
  9. It was fun seeing the straws in action!


Hope you enjoyed seeing some of my Christmas crafting. Stay tuned for a few pictures of our Kitschmas cocktail party soon. What holiday crafts have YOU been up to?

Thursday, December 6, 2012

It's beginning to look a lot like Christmas pullover time

December marks the month I whip out all of my winter-themed pullovers. What can I say, I just have a thing for them. They naturally make a great casual outfit with trousers or jeans, but it can be hard to dress them up, which I like to do from time to time. I went for a bit of sparkle and gold in my accessories to do the job.


(Sorry for the dead yard photos. That's one caveat of a tiny city yard, there aren't a lot of options for where to take photos. I'm not complaining, I'm happy to have a yard at all.)

Anyway, I just adore this vintage sweater. When I got it last year, the neck was bound off so tight I couldn't pull my head through. I knew I'd never find wool to match a vintage sweater perfectly in order to unpick the bind off and make it more stretchy, so instead I unpicked it and one more row, then bound off much more loosely. That was enough to juuust get it over my noggin.


The belt is one of my latest purchases and I love it so much I can't believe there was a second when I held it in my hands at the Vintage Garage that I contemplated not buying it. Admittedly, it was only a split second.


I don't know the exact era of this sweater. The deep welt is very 40s, but the design reminds me more of similarly-themed winter sweater patterns I have from the 50s. You can see from the label it's hand-knit, and presumably for the Quebec tourist trade. I love the thought that someone probably brought this home from a winter adventure as a memento of their holiday. Apparently that person was Linda, whose name was stamped on the label.


I paired it with a brooch and earring set that were my grandmother's. For years I had the brooch and just one earring because my mom couldn't find the other earring at the time she gave them to me. Then a month before our wedding, I called her up and told her to hunt down the other earring. Of course, being a dutiful mother, she found it, and so I was married in them.


Gratuitous pet shot!


 Doesn't the sweater remind you of this 1946 tourism ad for Quebec? Crisp tonic air, dry power snow...

{ Source: My Papered Past on Etsy, ad for sale here }

It's getting chilly again here after a warm spell, and wearing this cotton skirt is making me think I'd like to sew a 40s style gored skirt in navy wool for winter. Oh yes, I think it shall be done.


outfit details

knit sweater: can't recall
50s brooch and earrings: my grandmother, via my mom
 watch: Ruby Lane from absolutely ages ago
belt: Dena at Vintage Garage
shoes: Remix


Monday, December 3, 2012

Completed: cake and vinegar dress

Hello everyone! Well let me just say a big humble thank you to everyone who enjoyed my back roll with a scarf tutorial. I'm so glad it's proved to be easy for others, and it's been fun seeing it crop up on so many heads. I forgot to mention another time it's a useful hairstyle: hiding when you try out a new setting pattern and you don't love the result. (I don't think you need to ask me to know how I found that one out.)

By the way, I've been drawn out of my Instagram hermit status by two lovely ladies, Land Girl 1980 and Fiercest Lilliputian, so feel free to add me @bygumbygolly. :)

♥  ♥ 

Tonight I'm happy to share my latest finished sewing project. This is the dress that prompted my pressing dilemma and subsequent pressing gratitude posts. Hence the "vinegar" part of the name, as that was the secret to pressing crisp lines in my fabric and saved this dress from the garbage heap early on.

The pattern is Simplicity 4992, from the 1940s. I liked the slim gored skirt and shirtwaist style, and thought it would make a good closet staple if I made it in a basic, solid color.


In other words, I wanted a "cake" dress! (Cake and vinegar dress, get it?) Those of you who sew may be familiar with the concept of cake vs. frosting in sewing (see Tasia's post here on the subject if not). Frosting refers to the fun and fancy stuff, while cake refers to the basics that we live in most days and need more of. I'm trying to round out my wardrobe, so I picked a sort of tan/beige/grayish wool-blend gabardine from my stash and went to it.

Of course, I had no idea that gabardine would be such a pain in the rear to press, or that I would never really be able to figure out how to attach the collar facing and the yoke (any words of advice, other than to be thankful it's hidden inside the facing and under the collar?). Pretty much right from the start I thought this dress was doomed.

But the problem is that I actually really like the final dress, even though it's not perfect.


Why is that a problem? Because that means at some point I'll want to make it again and then I'll have to figure out that yoke/collar thing and work out some other issues, most of which I didn't document well because I thought this was going to be a one-shot deal early on. So in the meantime, I'll just enjoy this one.


(You'll have to pardon the wonky lighting, the sun kept coming and going. And speaking of pardons, I clearly need to go back and re-press most of the skirt seams. I love the things you learn only after you photograph something...)

While taking photos, I noticed berries on a plant that didn't do anything all summer except be green. Exciting!


Like I said, the dress does have some issues. The back bodice could stand to be about 2" shorter and the collar isn't quite long enough in the back. I'm tempted to tack it down like Bex asked if I would.


I also think I may have set in the sleeves in reverse as I had to re-draft the them beause I cut about 2" off the bodice sides and shoulder, and I did it rather on the fly since I thought it would all turn out to be crappy, anyway. I know I'm my own worst critic though and would never notice it on something ready-to-wear. On the positive side, it features a great lapped zipper with my first time using a vintage metal zipper (I know, I know) and it was my first project using my new serger! I can only do one thing on it so far but I already don't how I lived without it.

Back to the bodice. This dress has me starting to wonder if, even though I'm a 36" bust and usually sew 34" bust vintage patterns, if I should instead be sewing 32" bust patterns and grading up the skirts, as they are often far too blousy on me up top. Short waist, big bust and vintage patterns with lots of gathers doesn't always add up well.


I love the buttons and buckle, which came from a vintage set still on the card. They're kind of a maroony-brown color that I thought would go with almost anything.


The belt was almost the end of me. I didn't have belting that was the appropriate width, so I first started by interfacing it to give it a bit of body, and then tried to turn it right side out. It was having none of that. About 45 minutes of my life later I threw it across the basement floor and started over. I ended up just hand-sewing it closed on the side that faces my body. I couldn't come up with anything else and I was so over this belt at that point that I'm lucky I finished it at all.


The fabric is a bit heavy and drapes well, and I think it'll be warm in winter but cool enough for spring and fall. It flows nicely in the breeze...


Frankly, it was a struggle for me to sew such a boring colored dress. If you're a fan of Retro Renovation, you might even think of it as "greige" in dress form. But I knew in the end it would be worth it, because it could easily be spruced up. I even had something in mind.


I have to say, it was worth the yawn-inducing color as I now have a dress that can go with virtually anything, most especially colorful knitwear.


In the end it was a project with lots of frustrations, but I learned some things along the way and it sparked a few ideas for the future. I'm pretty pleased with the final dress and I'm sure it'll get a lot of wear this winter!


Related Posts Plugin for WordPress, Blogger...