I haven't done any sewing since last week, so since I'm still procrastinating putting a button on my castles skirt, naturally I thought I'd start another project. (Makes perfect sense, right?)
I've really been in the mood to sew another blouse. I just couldn't make up my mind when rifling through my blouse patterns, so I decided I'd make an attempt at turning the bodice portions of this vintage dress pattern into a blouse. It's a mail order pattern, Anne Adams 4855.
I figured the concept was simple enough that I could handle it. I lengthened the bodice and facing pieces, and changed the side seams slightly. I'll have to figure out how to move the dart tucks when I get there, because they had to be angled differently and I'm not quite sure where they should end. It was also a bit hard to tell exactly how the front pieces overlap, so I may end up finding out that it's a little big, but that's one of the reasons why I'm doing a muslin. Well, that and so I don't find out I completely botched up my bodice-into-blouse plans.
I'm not convinced I'll like the deep armholes, but I thought the whole bodice was really unique with the sleeves, collar and lower neckline, so I'm excited to try it out. I'm going to use some white cotton from my stash that has a small raised diamond pattern on it, because I desperately need a white blouse in my wardrobe. But I also think it would look great in a bold print with a contrast collar (and possibly sleeves), too. What do you think? I have to decide if I should interface the collar. I think I should, since the cotton is fairly drapey. I have some white cotton batiste that might work, and some sew-in non-woven interfacing but I'm a little nervous as the interfacing hasn't been washed. I don't really want to have to wait until the next time we do laundry to start the project.
I love mail order patterns when they come with the original envelope! Postmarked in New York, delivered in Barbourville, Kentucky. Unfortunately I can't find an actual date on the stamps. On a lark I looked up Verna B. Mays. I'm not sure if she's still alive, but if so, she would have celebrated her 93rd birthday on January 6th. Here's to sharing a piece of history with her!
Wednesday, March 9, 2011
Monday, March 7, 2011
Blog award, i.e. 7 things about me
I have received a few blog awards lately and have been remiss in posting about it! Most recently I received the Stylish Blogger Award from the wonderful Temperamental Broad, so thank you very much! ♥
Without further ado, here are seven completely random things you probably didn't know about me.
1. I'm left-handed. On my mom's side, so was my grandfather, and so is my uncle and my cousin. Four lefties in three generations. Pretty cool. I've always thought it was neat that I was left-handed. I love how lefties are always happy to discover another leftie. Last summer on a plane the guy next to me asked if I was left-handed. As I was asking him how he knew, it dawned on me: he saw my watch on my right wrist, not left.
2. My favorite time period outside the 1940s and 1950s is the middle ages in Western Europe, specifically the UK and Ireland. I love castles and chivalry and the legends of King Arthur. In fact, in my sleeve, the name of one of my favorite books, Thomas Malory's Le Morte d'Arthur, appears on the back of my arm.
3. I have been knitting since Christmas 2005. Shortly before that, my mom re-learned to knit after over a decade of not knitting. I crocheted at the time (having taught myself from a booklet), but didn't think I could ever grasp knitting. It just seemed way too complicated. But I somewhat grudgingly let my mom teach me over a Christmas visit that year. These days, I don't think there's about anything I can't knit. It's just something I 'get'. (I definitely can't say the same about my sewing.)
4. I am a bit of a tomboy.
I like to think of myself as kind of a vintage tomboy. My vintage fashion sense leans towards the casual end of the spectrum. I adore style icons like Jean Harlow and Katherine Hepburn who unapologetically wore trousers and wore them exceptionally well. There are really no cocktail dresses or high heels in my repertoire. While I've been enjoying skirts and dresses more lately, I'm most comfortable in wedgies or flats, high-waisted jeans or trousers and a blouse. I swear like a truck driver, there's usually something a little messy about my hair even when done up in a great 40s 'do, and I can never keep up with my nail polish before it chips. On the other hand, you will never catch me without my nails painted red, and about the only time I'm not wearing red lipstick is when I'm at work or out hiking or camping. Go figure.
5. I hate coffee. You cannot trick me into having something coffee-flavored by calling it mocha. I don't like the smell, I don't like the taste. Coffee has touched my lips exactly three times in my life. Yuck. My version of coffee is black tea, like you'd have in the UK or Ireland. I learned to drink tea when I did study abroad in Ireland in college. When Mel and I went to Ireland last fall, I was absolutely ecstatic to have tea and cake at Bewley's Cafe in Dublin.
6. I have a dishwasher and don't use it. We've gotten to the point where about the only non-vintage kitchenware that we use regularly (outside of a few cooking utensils and some random mugs and pint glasses) is our Fiestaware plates. So while we were hand-washing the red Bakelite flatware and cooking utensils and our glasses, we'd always end up with all of our plates in the dishwasher and have to start fetching them back out again because there wasn't enough to fill the dishwasher before we'd need them again. So we really just don't use it any longer.
7. I know almost nothing about pop culture. I couldn't pick Lady Gaga out of a crowd, I really have no idea who Justin Beiber or Katy Perry are, and I don't watch Glee. In fact I haven't watched a network TV show in more than 10 years. But I can really geek out on the Discovery Channel, Science Channel, History Channel, Food Network and Travel Channel. We're watching Food Network as I type. :)
Now I'm supposed to give this award to 7 other deserving bloggers. But I've been getting to know so many awesome blogs! So I'm going to do this in a slightly different way. I'll post some great international blogs I've been enjoying, from non-native English speakers—six vintage-inspired ones and one great artist. If you haven't discovered them already, hope you enjoy them, too!
Without further ado, here are seven completely random things you probably didn't know about me.
1. I'm left-handed. On my mom's side, so was my grandfather, and so is my uncle and my cousin. Four lefties in three generations. Pretty cool. I've always thought it was neat that I was left-handed. I love how lefties are always happy to discover another leftie. Last summer on a plane the guy next to me asked if I was left-handed. As I was asking him how he knew, it dawned on me: he saw my watch on my right wrist, not left.
2. My favorite time period outside the 1940s and 1950s is the middle ages in Western Europe, specifically the UK and Ireland. I love castles and chivalry and the legends of King Arthur. In fact, in my sleeve, the name of one of my favorite books, Thomas Malory's Le Morte d'Arthur, appears on the back of my arm.
3. I have been knitting since Christmas 2005. Shortly before that, my mom re-learned to knit after over a decade of not knitting. I crocheted at the time (having taught myself from a booklet), but didn't think I could ever grasp knitting. It just seemed way too complicated. But I somewhat grudgingly let my mom teach me over a Christmas visit that year. These days, I don't think there's about anything I can't knit. It's just something I 'get'. (I definitely can't say the same about my sewing.)
4. I am a bit of a tomboy.
I like to think of myself as kind of a vintage tomboy. My vintage fashion sense leans towards the casual end of the spectrum. I adore style icons like Jean Harlow and Katherine Hepburn who unapologetically wore trousers and wore them exceptionally well. There are really no cocktail dresses or high heels in my repertoire. While I've been enjoying skirts and dresses more lately, I'm most comfortable in wedgies or flats, high-waisted jeans or trousers and a blouse. I swear like a truck driver, there's usually something a little messy about my hair even when done up in a great 40s 'do, and I can never keep up with my nail polish before it chips. On the other hand, you will never catch me without my nails painted red, and about the only time I'm not wearing red lipstick is when I'm at work or out hiking or camping. Go figure.
5. I hate coffee. You cannot trick me into having something coffee-flavored by calling it mocha. I don't like the smell, I don't like the taste. Coffee has touched my lips exactly three times in my life. Yuck. My version of coffee is black tea, like you'd have in the UK or Ireland. I learned to drink tea when I did study abroad in Ireland in college. When Mel and I went to Ireland last fall, I was absolutely ecstatic to have tea and cake at Bewley's Cafe in Dublin.
6. I have a dishwasher and don't use it. We've gotten to the point where about the only non-vintage kitchenware that we use regularly (outside of a few cooking utensils and some random mugs and pint glasses) is our Fiestaware plates. So while we were hand-washing the red Bakelite flatware and cooking utensils and our glasses, we'd always end up with all of our plates in the dishwasher and have to start fetching them back out again because there wasn't enough to fill the dishwasher before we'd need them again. So we really just don't use it any longer.
7. I know almost nothing about pop culture. I couldn't pick Lady Gaga out of a crowd, I really have no idea who Justin Beiber or Katy Perry are, and I don't watch Glee. In fact I haven't watched a network TV show in more than 10 years. But I can really geek out on the Discovery Channel, Science Channel, History Channel, Food Network and Travel Channel. We're watching Food Network as I type. :)
Now I'm supposed to give this award to 7 other deserving bloggers. But I've been getting to know so many awesome blogs! So I'm going to do this in a slightly different way. I'll post some great international blogs I've been enjoying, from non-native English speakers—six vintage-inspired ones and one great artist. If you haven't discovered them already, hope you enjoy them, too!
Tags:
blog awards,
knitting,
tattoos,
tea
Friday, March 4, 2011
Vintage show finds
I've been meaning to post this all week! Last Saturday, we went out to the 'burbs for a huge annual vintage clothing, jewelry and textiles show. We missed last year (though I can't recall why), so I was particularly excited about it this year. I was literally talking about it for days leading up to it. I took some photos of my finds, but mind you nothing has been ironed and I just threw them on, so forgive the lackluster appearance.
I got two dresses, one of which is a housedress with a hidden front zipper, so I will probably dare to actually wear it out into the world. It was so wrinkled that even the photo looked terrible, so I'll give you a taste of the fabric. It's a neat light beige checkerboard print with antique scrollwork type of designs all over. The buttons are really cute, too, and I love the attention to the lap over the zipper.
Next was a blue dress in an amazing almost deco print. I'm not sure what the fabric is, but it's slightly stiff and sheer but very smooth, and rather unlike anything I've ever felt. Anyone hazard a guess?
I love the rhinestone buttons. The self-face belt is tied off with sky blue organza (or something similar), which is also used around the buttonholes. That is some serious attention to detail!
I also found a great skirt, sold by the guys who run Knee Deep Vintage, a vintage clothing store across town that we've never been to. They were really friendly and are having an anniversary sale at their shop next Friday that we're seriously considering going to. Randomly in conversation last night with a friend, we found out they're apparently good friends with another friend of ours. Small world. They had a lot of killer dresses that were right up my alley but way too big, sadly. The skirt I got from them is pleated all the way around, giving it a nice full skirt feel without the need for a crinoline (because if you're starting to get to know me, you might have guessed I'm not all that fussy of a gal...). It's really, really making me want a pair of green shoes to go with it. Or espadrilles. I'm not sure how my wardrobe doesn't have a pair of espadrilles.
I then found a great cowboy shirt, which I am always on the lookout for and they are rather rare! I didn't model it because, well, it's a shirt. You get the idea. I love the texture of the fabric in this.
The buttons are really interesting. At first they look like pearl snaps, but are actually buttons with a front and back part, inserted through a second set of buttonholes. I'm not sure I've ever seen a closure quite like it. At first I thought perhaps it was a way for the band to be reversible, making it a unisex shirt, but the shirt is clearly for a woman, so I'm really not sure.
I also got a carved butterscotch Bakelite bangle to add to my collection...
And then there's the pièce de résistance. Towards the end of our tour through the event, we headed into a great booth, where I spied a Mexican circle skirt. Now, I love these as much as the next girl, but as you probably know, they can be ridiculously expensive. I have one that I was lucky enough to get from my mom, from probably a couple of decades ago when she thrifted several vintage pieces that are now highly collectible. It's one of my most cherished pieces.
Anyway, I saw several Mexican skirts at the vintage show, all with the price tags I'm accustomed to seeing on eBay and Etsy. I seem to recall $95 was on the low end of the scale and $325 (I kid you not) on the high end. Then I spotted this one in the booth, and looked at the price tag. And it was cheap. And marked "as is". I noted a few light stains, but nothing I couldn't live with, especially at that price. I am certainly not above wearing gently "whoops"-ed garments, especially if I can get a good deal. It adds a bit of history and intrigue for me, allowing me to play a bit of Sherlock Holmes (Jeremy Brett version, only) with my garments. What fun did the owner have in this skirt? What cocktail or kitschy appetizer did she spill on it? On the other hand, it makes me crazy when I see people selling items on eBay for high collector prices and then they proceed to show you a series of photos of rips, tears, holes and/or stains.
So behold, my new skirt. (Don't mind the poorly tucked-in shirt, I was rushing.)
I talked to the woman who ran the booth for several minutes about it. She was super sweet and friendly (and obviously a very honest seller!), and runs an Etsy shop with several yummy items, Bombshell Shocked. My only regret was that I was too tired at that point to give the rest of her booth the attention it deserved, because I could tell she had some goodies in there!
When I was interested in the skirt, she said I looked like a woman who could wear a sombrero, referring of course to the skirt. Well, I was dressed in this jacket, so no wonder.
Pretty funny! (A woman asked to take my photo, so this is from her blog. The big white spot on the jacket is just a lens flare.) Even funnier, I saw two almost exactly just like it for sale there. I got sooo many compliments on this jacket at the event, I kept telling people there were other versions of it there if they wanted one too . :)
This weekend our plans aren't nearly as glamorous. House cleaning, a few errands and I'm hoping to get in some sewing and knitting time. I have a skirt 99% complete and it's just awaiting a closure. I'm thinking I may use a large vintage button, instead of hook and eyes on the inside. What do you think?
I'm really pleased with how the skirt came out, and will post about it soon (still have to photograph my Swing Dress anyway, lighting has been the pits in our home lately). My topstitching still needs some work, but overall I'm really happy with it, and the pleats make a spectacular shape with the somewhat heavier cotton I used. At first when I started it, I thought great, I've barely started my handmade vintage wardrobe challenge and I'm already violating my color palette. This is a cute cotton from my stash and it has a lovely novelty print, and I was itching to turn it into something. That's all I was focused on. But then I realized hey...many of those castles and turrets are butterscotch yellow!
I got two dresses, one of which is a housedress with a hidden front zipper, so I will probably dare to actually wear it out into the world. It was so wrinkled that even the photo looked terrible, so I'll give you a taste of the fabric. It's a neat light beige checkerboard print with antique scrollwork type of designs all over. The buttons are really cute, too, and I love the attention to the lap over the zipper.
Next was a blue dress in an amazing almost deco print. I'm not sure what the fabric is, but it's slightly stiff and sheer but very smooth, and rather unlike anything I've ever felt. Anyone hazard a guess?
I love the rhinestone buttons. The self-face belt is tied off with sky blue organza (or something similar), which is also used around the buttonholes. That is some serious attention to detail!
I also found a great skirt, sold by the guys who run Knee Deep Vintage, a vintage clothing store across town that we've never been to. They were really friendly and are having an anniversary sale at their shop next Friday that we're seriously considering going to. Randomly in conversation last night with a friend, we found out they're apparently good friends with another friend of ours. Small world. They had a lot of killer dresses that were right up my alley but way too big, sadly. The skirt I got from them is pleated all the way around, giving it a nice full skirt feel without the need for a crinoline (because if you're starting to get to know me, you might have guessed I'm not all that fussy of a gal...). It's really, really making me want a pair of green shoes to go with it. Or espadrilles. I'm not sure how my wardrobe doesn't have a pair of espadrilles.
I then found a great cowboy shirt, which I am always on the lookout for and they are rather rare! I didn't model it because, well, it's a shirt. You get the idea. I love the texture of the fabric in this.
The buttons are really interesting. At first they look like pearl snaps, but are actually buttons with a front and back part, inserted through a second set of buttonholes. I'm not sure I've ever seen a closure quite like it. At first I thought perhaps it was a way for the band to be reversible, making it a unisex shirt, but the shirt is clearly for a woman, so I'm really not sure.
I also got a carved butterscotch Bakelite bangle to add to my collection...
And then there's the pièce de résistance. Towards the end of our tour through the event, we headed into a great booth, where I spied a Mexican circle skirt. Now, I love these as much as the next girl, but as you probably know, they can be ridiculously expensive. I have one that I was lucky enough to get from my mom, from probably a couple of decades ago when she thrifted several vintage pieces that are now highly collectible. It's one of my most cherished pieces.
Anyway, I saw several Mexican skirts at the vintage show, all with the price tags I'm accustomed to seeing on eBay and Etsy. I seem to recall $95 was on the low end of the scale and $325 (I kid you not) on the high end. Then I spotted this one in the booth, and looked at the price tag. And it was cheap. And marked "as is". I noted a few light stains, but nothing I couldn't live with, especially at that price. I am certainly not above wearing gently "whoops"-ed garments, especially if I can get a good deal. It adds a bit of history and intrigue for me, allowing me to play a bit of Sherlock Holmes (Jeremy Brett version, only) with my garments. What fun did the owner have in this skirt? What cocktail or kitschy appetizer did she spill on it? On the other hand, it makes me crazy when I see people selling items on eBay for high collector prices and then they proceed to show you a series of photos of rips, tears, holes and/or stains.
So behold, my new skirt. (Don't mind the poorly tucked-in shirt, I was rushing.)
I talked to the woman who ran the booth for several minutes about it. She was super sweet and friendly (and obviously a very honest seller!), and runs an Etsy shop with several yummy items, Bombshell Shocked. My only regret was that I was too tired at that point to give the rest of her booth the attention it deserved, because I could tell she had some goodies in there!
When I was interested in the skirt, she said I looked like a woman who could wear a sombrero, referring of course to the skirt. Well, I was dressed in this jacket, so no wonder.
| Photo from purevintagechicago.com |
This weekend our plans aren't nearly as glamorous. House cleaning, a few errands and I'm hoping to get in some sewing and knitting time. I have a skirt 99% complete and it's just awaiting a closure. I'm thinking I may use a large vintage button, instead of hook and eyes on the inside. What do you think?
I'm really pleased with how the skirt came out, and will post about it soon (still have to photograph my Swing Dress anyway, lighting has been the pits in our home lately). My topstitching still needs some work, but overall I'm really happy with it, and the pleats make a spectacular shape with the somewhat heavier cotton I used. At first when I started it, I thought great, I've barely started my handmade vintage wardrobe challenge and I'm already violating my color palette. This is a cute cotton from my stash and it has a lovely novelty print, and I was itching to turn it into something. That's all I was focused on. But then I realized hey...many of those castles and turrets are butterscotch yellow!
Have a great weekend, everyone!
Briar Rose Vintage KAL: Thoughts on reading the pattern
Happy Friday!
I promised a post that I'm not sure very many of you actually need, but I thought it would be helpful just in case (and since I know how online knit-alongs go, it might prove useful for someone in the future who plans to knit Briar Rose).
I'm going to talk a little bit about reading our knitting pattern. I know sometimes for newer knitters, when you look at a knitting pattern it might as well be written in Chinese, for all the sense it makes to you.
Reading our pattern
Knitting patterns usually follow a standard format and use standard abbreviations. There are sometimes a bit of variety in terms among English-speaking countries, but so far I've never encountered a knitting term I couldn't look up online and find the answer to. Briar Rose happens to be an Australian pattern, but every term used in the original pattern was a very familiar term in American patterns, too. Let's look at the abbreviations used in Briar Rose.
Not very many, is it? Some patterns use a lot more appreviations, though still standard ones like CO for casting on, BO for binding off, incr. for increases, decr. for decreases, etc. But Briar Rose is actually writes most of these out, making it a pretty nice pattern to follow for beginners and advanced knitters alike.
You know how I said most knitting patterns follow a standard format? This works nicely when you're knitting a sweater, because you already have some sense of how it's going to be put together when you go into it. This is especially true of most vintage knitting patterns (though there are always exceptions for different construction or other techniques, like a top down raglan or round yoke pullover). They usually start at the bottom hem as the cast on edge, work the back and front separately (or in the case of a cardigan, two front pieces are worked), then the sleeves, then anything else like shoulder pads, collars or button bands, then sew it all together. And Briar Rose follows exactly this same format. You can think of it as a familiar formula. And once you're used to the formula, that's when you can really start putting in your own knitterly tweaks.
Just take your time and read through the pattern ahead of time (which in this case, we've all done if we had to resize it). Try and work out what each line individually is trying to tell you. Breaking it down into bits is much easier and much less daunting than trying to look at the pattern as a whole! Go section by section, line by line, and if it helps you, write out little notes on your pattern to make it clear, or write out the pattern entirely in a way that makes sense to you! When I print out a pattern it's always full of notes, things I've highlighted, math calculations, you name it.
Now here's something the pattern doesn't cover, that I thought it might be nice to touch on.
Many patterns (and certainly not vintage patterns) do not specify how to work increases on a row. They simply say something like "increase 1 st each end of every 6th row" or "k2tog 1 st each end next 4 rows". That's fine and dandy, but do you necessarily want to work the same type of increase or decrease on both sides? You certainly can, and it doesn't make all that much of a difference. However there's a nice technique where you can 'mirror' or 'pair' the increases or decreases, meaning that they slant in opposite directions according to which side of the garment you're on. Each type of increase and decrease either slants to the left or to the right, so if you have one slanting each way on the opposite sides of the garment, you can add a nice, professional touch to your garment.
I have always loved this visual example from KnittingHelp.com of all the types of increases you can work on either side of a garment and this visual example of all the types of decreases you can work on either side of a garment to match them up. It's been hugely helpful to me over the years.
I recently read about an interesting technique for decreasing (which you'll need to do up by the armholes) which I haven't tried out yet. Apparently you can acheive less visible decreases by switching the usual slant direction of the decrease you work. Now, how would I normally pair my decreases?
At the beginning of a right-side (RS) row I normally work a ssk (slip, slip, knit) and at the end of the row I work a k2tog. I put 2 stitches between the edge and the decrease. This is considered full-fashioned decreases. But with this other technique you only leave 1 stitch at each edge, and you swap out the decreases—so a k2tog one stitch in from the beginning of the row, and a ssk one stitch in from the end of the row. I'm definitely curious what this looks like, so I'll be giving it a shot with my Briar Rose.
I hope everyone has cast on or will be soon. How's it going so far? I'm still working through my ribbing (which I hate doing, by the way). Well, when my knitting cheerleader isn't using it as a pillow!
I promised a post that I'm not sure very many of you actually need, but I thought it would be helpful just in case (and since I know how online knit-alongs go, it might prove useful for someone in the future who plans to knit Briar Rose).
I'm going to talk a little bit about reading our knitting pattern. I know sometimes for newer knitters, when you look at a knitting pattern it might as well be written in Chinese, for all the sense it makes to you.
Reading our pattern
Knitting patterns usually follow a standard format and use standard abbreviations. There are sometimes a bit of variety in terms among English-speaking countries, but so far I've never encountered a knitting term I couldn't look up online and find the answer to. Briar Rose happens to be an Australian pattern, but every term used in the original pattern was a very familiar term in American patterns, too. Let's look at the abbreviations used in Briar Rose.
| Abbreviation | What it means | Example from pattern |
| st / sts | stitch / stitches | Cast on 6 sts |
| K | knit | K. 40 stitches |
| P | purl | P. to end of row |
| st. st. | stockinette stitch | work in st. st. |
| k2tog / k. 2 tog | knit 2 sts together | k. 2 tog each end of next 2 rows |
| k3tog /k. 3 tog | knit 3 sts together | k. 3 tog, K. 9 |
| D.C. | double crochet (video) | hey, we're supposed to be knitting here! ;) |
Not very many, is it? Some patterns use a lot more appreviations, though still standard ones like CO for casting on, BO for binding off, incr. for increases, decr. for decreases, etc. But Briar Rose is actually writes most of these out, making it a pretty nice pattern to follow for beginners and advanced knitters alike.
You know how I said most knitting patterns follow a standard format? This works nicely when you're knitting a sweater, because you already have some sense of how it's going to be put together when you go into it. This is especially true of most vintage knitting patterns (though there are always exceptions for different construction or other techniques, like a top down raglan or round yoke pullover). They usually start at the bottom hem as the cast on edge, work the back and front separately (or in the case of a cardigan, two front pieces are worked), then the sleeves, then anything else like shoulder pads, collars or button bands, then sew it all together. And Briar Rose follows exactly this same format. You can think of it as a familiar formula. And once you're used to the formula, that's when you can really start putting in your own knitterly tweaks.
Just take your time and read through the pattern ahead of time (which in this case, we've all done if we had to resize it). Try and work out what each line individually is trying to tell you. Breaking it down into bits is much easier and much less daunting than trying to look at the pattern as a whole! Go section by section, line by line, and if it helps you, write out little notes on your pattern to make it clear, or write out the pattern entirely in a way that makes sense to you! When I print out a pattern it's always full of notes, things I've highlighted, math calculations, you name it.
Now here's something the pattern doesn't cover, that I thought it might be nice to touch on.
Mirrored increases / decreases
Many patterns (and certainly not vintage patterns) do not specify how to work increases on a row. They simply say something like "increase 1 st each end of every 6th row" or "k2tog 1 st each end next 4 rows". That's fine and dandy, but do you necessarily want to work the same type of increase or decrease on both sides? You certainly can, and it doesn't make all that much of a difference. However there's a nice technique where you can 'mirror' or 'pair' the increases or decreases, meaning that they slant in opposite directions according to which side of the garment you're on. Each type of increase and decrease either slants to the left or to the right, so if you have one slanting each way on the opposite sides of the garment, you can add a nice, professional touch to your garment.
I have always loved this visual example from KnittingHelp.com of all the types of increases you can work on either side of a garment and this visual example of all the types of decreases you can work on either side of a garment to match them up. It's been hugely helpful to me over the years.
I recently read about an interesting technique for decreasing (which you'll need to do up by the armholes) which I haven't tried out yet. Apparently you can acheive less visible decreases by switching the usual slant direction of the decrease you work. Now, how would I normally pair my decreases?
At the beginning of a right-side (RS) row I normally work a ssk (slip, slip, knit) and at the end of the row I work a k2tog. I put 2 stitches between the edge and the decrease. This is considered full-fashioned decreases. But with this other technique you only leave 1 stitch at each edge, and you swap out the decreases—so a k2tog one stitch in from the beginning of the row, and a ssk one stitch in from the end of the row. I'm definitely curious what this looks like, so I'll be giving it a shot with my Briar Rose.
I hope everyone has cast on or will be soon. How's it going so far? I'm still working through my ribbing (which I hate doing, by the way). Well, when my knitting cheerleader isn't using it as a pillow!
Resources for this post:
- The Craft Yarn Council has a nice primer on how to read a knitting pattern. It covers basic abbreviations and the Knitting Garments section towards the bottom might be useful for you.
- Cat Bordhi video on paired increases, presenting the technique she uses to pair up increases. (Even if you know how to do them, watch it just to hear her talk about a knit zit, it's too funny.)
- KnittingHelp.com has pages on decreases and increases that include written instructions as well as links to video tutorials on each version.
Wednesday, March 2, 2011
Cardigan twins?
Today the funniest thing occurred, and something rare in the life of a knitter, I think.
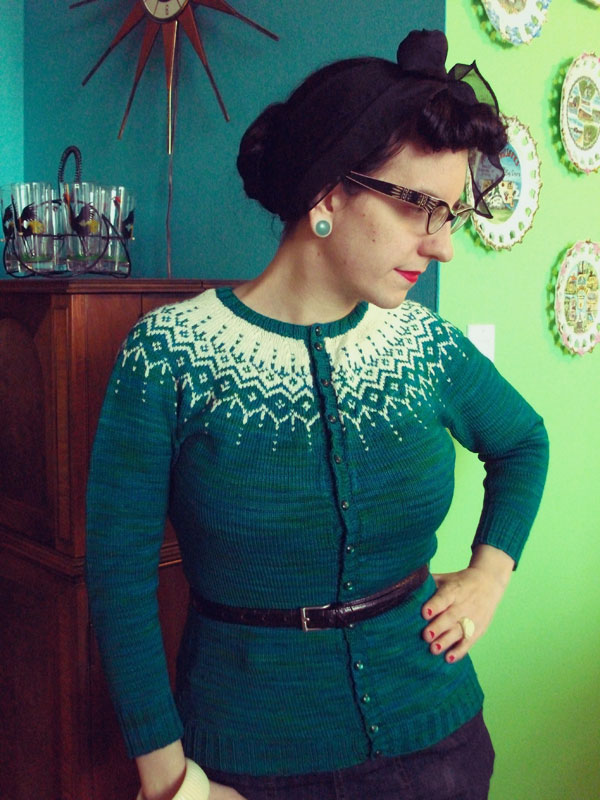
A new reader to my blog, Miss Margarita, left me a comment this afternoon, and when I went to her blog I discovered an adorable photo of her... wearing a sweater I've actually knit for myself! Miss Margarita, I believe you and I may be cardigan twins! From her blog, it says it was knit for her as a gift (lucky duck!). To add even more intrigue to this story, she lives halfway around the world in Norway.
I had to run right to my drawer and put it on to snap a few photos of the sweater before my brief window of after-work sun faded. So don't mind the tired face.
This sweater was one of the first major pieces of colorwork that I completed, my first time resizing an entire sweater by changing my gauge, and one of my first cardigans. I knit it in the summer of 2009. I changed the gauge from sport to fingering weight, knit bracelet length sleeves and used 13 vintage moonglow buttons that were a perfect match.
It's not a vintage pattern, but I feel it's reminiscent of vintage Nordic knitting patterns, which I love and collect. It's a DROPS Design pattern. DROPS is a Norwegian company that writes patterns and manufactures yarn. They've translated most if not all of their patterns into English, fortunately for those of us non-Norwegian knitters.
Now I once saw a woman in downtown Chicago wearing a hat that I've also knit, but it was a pattern that was extremely popular on Ravelry (4,200 people have knit it), so while I was surprised, I wasn't that surprised.
But what are the odds of finding another vintage-loving blogger, halfway around the world, with the same modern hand-knit sweater as I knit myself?? (That, incidentally, Ravelry says only 79 people have knit. And several of those, including mine, were knit during a knit-along with that pattern the summer I knit mine.)
So Miss Margarita, if you read this (you're probably in bed right now in your time zone, lol), you'll have to tell me if this is indeed the same sweater, or just looks similar. Cheers!
A new reader to my blog, Miss Margarita, left me a comment this afternoon, and when I went to her blog I discovered an adorable photo of her... wearing a sweater I've actually knit for myself! Miss Margarita, I believe you and I may be cardigan twins! From her blog, it says it was knit for her as a gift (lucky duck!). To add even more intrigue to this story, she lives halfway around the world in Norway.
I had to run right to my drawer and put it on to snap a few photos of the sweater before my brief window of after-work sun faded. So don't mind the tired face.
This sweater was one of the first major pieces of colorwork that I completed, my first time resizing an entire sweater by changing my gauge, and one of my first cardigans. I knit it in the summer of 2009. I changed the gauge from sport to fingering weight, knit bracelet length sleeves and used 13 vintage moonglow buttons that were a perfect match.
It's not a vintage pattern, but I feel it's reminiscent of vintage Nordic knitting patterns, which I love and collect. It's a DROPS Design pattern. DROPS is a Norwegian company that writes patterns and manufactures yarn. They've translated most if not all of their patterns into English, fortunately for those of us non-Norwegian knitters.
Now I once saw a woman in downtown Chicago wearing a hat that I've also knit, but it was a pattern that was extremely popular on Ravelry (4,200 people have knit it), so while I was surprised, I wasn't that surprised.
But what are the odds of finding another vintage-loving blogger, halfway around the world, with the same modern hand-knit sweater as I knit myself?? (That, incidentally, Ravelry says only 79 people have knit. And several of those, including mine, were knit during a knit-along with that pattern the summer I knit mine.)
So Miss Margarita, if you read this (you're probably in bed right now in your time zone, lol), you'll have to tell me if this is indeed the same sweater, or just looks similar. Cheers!
Tuesday, March 1, 2011
Briar Rose Vintage KAL: Knit-along cast on!
Thanks so much everyone for the kind words about our anniversary! ♥
Know what today is? That's right, those of you who are knit-alongers know: March 1st, our cast on day for the Briar Rose Vintage Knit-Along!
Today was the first day since fall that I had to break out my sunglasses again when I left for work this morning, so that tells me spring really is just around the corner. That makes it the perfect day to cast on for a lovely spring-y vintage sweater. Yay!
I'm so excited to get home later at cast on! Though I must admit...I still have to make a few decisions for my own sweater. I spent so much time in the last two weeks working on math that I haven't done my own yet. :)
I promised to cover a couple of topics this week: knitting the body in the round vs. knitting flat, and how to read the knitting pattern. I'll cover round/flat today, and will cover how to read the pattern in a couple of days when I can spend a bit more time on the subject.
Before you cast on, you have to make a decision: are you going to knit the sweater as written, knitting a front piece and a back piece and then sewing them together, or knit the body in the round up to the armholes?
If you're not an experienced sweater knitter and having trouble visualizing what the difference is, I hope this version of our now-familiar generic sweater should help a bit. This shows you essentially how you would knit the sweater in the round.
When you knit a sweater in the round, you start at the cast on edge, same as if you were knitting the front or the back piece. However, you cast on all the stitches for the body onto a circular needle—front and back, together, then join to knit in the round. (I assume you know how to knit in the round, if not check out the Large Diameter Circular Knitting video at KnittingHelp.com.) You then knit the body as a tube up to the armholes, instead of sewing it up into a tube.
When you cast on, place a stitch marker at the beginning of the round (Marker A), and then place a second stitch marker halfway through your row (Marker B). So if you have 200 stitches on the needle, place Marker B after the 100th stitch. Those two markers will mark your sides, where your seams would be if you were sewing the front and back together. Think of each stitch marker as marking the beginning/end of the front and the back pieces, if you'd been knitting them flat—the beginning of row (Marker A) starts the beginning of your back, and the halfway point (Marker B) starts the beginning of your front. So half the stitches on the needle represent the front, half represent the back.
When you get to the point in your pattern where you start the increases, work them on either side of each stitch marker (meaning 4 increases per row and not 2, like you'd be doing if you were working the front and back separately). This will work your front and back increases at the same time in the same row, since you have all the body stitches on the needle at the same time. I like to work decreases and increases two stitches in from the marker (when knitting in the round) or edge (when knitting flat or at an armhole or neckline), which is considered full-fashioned.
What do you do when you get to the armhole cast off rows? You'll just work on half the stitches at a time. This is how to do it.
The instructions for the cast off row read (remember these numbers will be different if you resized the pattern):
Up until this point you've been working in the round, with your markers telling you where to work your increases and indicating where the beginning of the front and back is. Now, you'll just work on half the stitches (meaning you'll work from the armhole up on the back stitches only, since our pattern has us work the back first).
Follow the pattern and cast off however many stitches your resized version tells you to, and continue across the row until you reach Marker B (which is the halfway point and marks the end of your back and beginning of your front). Turn your work. This now marks the beginning of the second row. You'll be purling across now. Cast off the same number of stitches as at the beginning of the previous row and continue working just on the stitches you just worked across. The other half of the stitches? Those are your front stitches and you won't need them again until you get to the front instructions from the armhole up, so place those stitches on waste yarn so they're out of your way.
Does that make sense? You knit in the round up to the armhole, then you divide your knitting in half and work the back instructions on half the stitches. Once the back is completed you'll return to the other half of the stitches that you left on waste yarn and work the front instructions on them. Then you'll join the shoulder seams like you normally would.
Things to keep in mind about knitting in the round
First: Your gauge might change from knitting in the round to flat knitting, as most people tend to purl looser than they knit. Try out a sample first. In my experience using fingering weight yarn, the difference is negligible and I don't notice a difference in my own knitting. However when I do this technique with heavier weight yarn like worsted, I often will switch to a smaller diameter needle when I get to the flat knitting. (This is something to keep in mind even if you're knitting a sweater flat but want to work the sleeves in the round.)
Second: Don't forget about your seam stitches. Remember when we did our math, we added 2 seam stitches to the front and 2 to the back, that would get 'eaten up' by the seam when we sewed the pieces together? If you work in the round, omit those stitches on the body from the armholes down to the cast on edge. Or just do your math such that you know the number of stitches you have on the needle matches the desired measurement you want.
Third: Why knit the body in the round up to the armholes? A lot of people don't like to purl, or find they are faster on knit rows than purl rows. Or they don't like to do any more sewing up of their knitting than they have to. Working in the round up to the armholes is not really a vintage technique, though I'm always tickled when I discover what we think of as a more modern knitting technique buried in a random vintage pattern (like short-row shoulder shaping, which I recently spied in a 1950 pattern) so I'm sure somewhere there are vintage patterns in which the body was worked in the round up to the armholes. I wanted to provide it as an alternative for those who'd like to try it. You're the boss of your knitting, so the choice is yours.
Any lingering questions I haven't covered before we start knitting? Like I said, I'll do a post a bit later this week on how to read a knitting pattern, for those of you who aren't as familiar. Feel free to start threads or post pictures in the Flickr group. I hope at this point I've provided you with everything you need to know to get started, so happy cast on, everyone!
Know what today is? That's right, those of you who are knit-alongers know: March 1st, our cast on day for the Briar Rose Vintage Knit-Along!
Today was the first day since fall that I had to break out my sunglasses again when I left for work this morning, so that tells me spring really is just around the corner. That makes it the perfect day to cast on for a lovely spring-y vintage sweater. Yay!
I'm so excited to get home later at cast on! Though I must admit...I still have to make a few decisions for my own sweater. I spent so much time in the last two weeks working on math that I haven't done my own yet. :)
I promised to cover a couple of topics this week: knitting the body in the round vs. knitting flat, and how to read the knitting pattern. I'll cover round/flat today, and will cover how to read the pattern in a couple of days when I can spend a bit more time on the subject.
Knitting the body in the round vs. knitting it flat
Before you cast on, you have to make a decision: are you going to knit the sweater as written, knitting a front piece and a back piece and then sewing them together, or knit the body in the round up to the armholes?
If you're not an experienced sweater knitter and having trouble visualizing what the difference is, I hope this version of our now-familiar generic sweater should help a bit. This shows you essentially how you would knit the sweater in the round.
When you knit a sweater in the round, you start at the cast on edge, same as if you were knitting the front or the back piece. However, you cast on all the stitches for the body onto a circular needle—front and back, together, then join to knit in the round. (I assume you know how to knit in the round, if not check out the Large Diameter Circular Knitting video at KnittingHelp.com.) You then knit the body as a tube up to the armholes, instead of sewing it up into a tube.
When you cast on, place a stitch marker at the beginning of the round (Marker A), and then place a second stitch marker halfway through your row (Marker B). So if you have 200 stitches on the needle, place Marker B after the 100th stitch. Those two markers will mark your sides, where your seams would be if you were sewing the front and back together. Think of each stitch marker as marking the beginning/end of the front and the back pieces, if you'd been knitting them flat—the beginning of row (Marker A) starts the beginning of your back, and the halfway point (Marker B) starts the beginning of your front. So half the stitches on the needle represent the front, half represent the back.
When you get to the point in your pattern where you start the increases, work them on either side of each stitch marker (meaning 4 increases per row and not 2, like you'd be doing if you were working the front and back separately). This will work your front and back increases at the same time in the same row, since you have all the body stitches on the needle at the same time. I like to work decreases and increases two stitches in from the marker (when knitting in the round) or edge (when knitting flat or at an armhole or neckline), which is considered full-fashioned.
What do you do when you get to the armhole cast off rows? You'll just work on half the stitches at a time. This is how to do it.
The instructions for the cast off row read (remember these numbers will be different if you resized the pattern):
From pattern:
When work measures 12 1/2" shape armholes by casting off 4 sts at the beginning of the next 2 rows.
Up until this point you've been working in the round, with your markers telling you where to work your increases and indicating where the beginning of the front and back is. Now, you'll just work on half the stitches (meaning you'll work from the armhole up on the back stitches only, since our pattern has us work the back first).
Follow the pattern and cast off however many stitches your resized version tells you to, and continue across the row until you reach Marker B (which is the halfway point and marks the end of your back and beginning of your front). Turn your work. This now marks the beginning of the second row. You'll be purling across now. Cast off the same number of stitches as at the beginning of the previous row and continue working just on the stitches you just worked across. The other half of the stitches? Those are your front stitches and you won't need them again until you get to the front instructions from the armhole up, so place those stitches on waste yarn so they're out of your way.
Does that make sense? You knit in the round up to the armhole, then you divide your knitting in half and work the back instructions on half the stitches. Once the back is completed you'll return to the other half of the stitches that you left on waste yarn and work the front instructions on them. Then you'll join the shoulder seams like you normally would.
Things to keep in mind about knitting in the round
First: Your gauge might change from knitting in the round to flat knitting, as most people tend to purl looser than they knit. Try out a sample first. In my experience using fingering weight yarn, the difference is negligible and I don't notice a difference in my own knitting. However when I do this technique with heavier weight yarn like worsted, I often will switch to a smaller diameter needle when I get to the flat knitting. (This is something to keep in mind even if you're knitting a sweater flat but want to work the sleeves in the round.)
Second: Don't forget about your seam stitches. Remember when we did our math, we added 2 seam stitches to the front and 2 to the back, that would get 'eaten up' by the seam when we sewed the pieces together? If you work in the round, omit those stitches on the body from the armholes down to the cast on edge. Or just do your math such that you know the number of stitches you have on the needle matches the desired measurement you want.
Third: Why knit the body in the round up to the armholes? A lot of people don't like to purl, or find they are faster on knit rows than purl rows. Or they don't like to do any more sewing up of their knitting than they have to. Working in the round up to the armholes is not really a vintage technique, though I'm always tickled when I discover what we think of as a more modern knitting technique buried in a random vintage pattern (like short-row shoulder shaping, which I recently spied in a 1950 pattern) so I'm sure somewhere there are vintage patterns in which the body was worked in the round up to the armholes. I wanted to provide it as an alternative for those who'd like to try it. You're the boss of your knitting, so the choice is yours.
Now go out there and cast on!
Any lingering questions I haven't covered before we start knitting? Like I said, I'll do a post a bit later this week on how to read a knitting pattern, for those of you who aren't as familiar. Feel free to start threads or post pictures in the Flickr group. I hope at this point I've provided you with everything you need to know to get started, so happy cast on, everyone!
Subscribe to:
Posts (Atom)