Showing posts with label knitting. Show all posts

Monday, June 24, 2013

Lumberjill squirrels hat

Friends, it's been awhile since I've completed a knitting project, and I have sewing to blame. While I've been busy filling out my wardrobe, my knitting has suffered, which is unusual for me and a side effect of sewing I don't like! So I may cool down the sewing a slight bit so I can focus on my (new) current knitting project. After I wipe a couple of projects off my plate that involve tutorials, that is... stay tuned!

That aside, I knew I wanted to knit my friend Elisa something for her birthday. She's an extremely generous person, a talented knitter and masterful quilter. And by masterful, we're talking she once sewed a quilt of the London Tube system that is accurate. I know!

I knew I wanted it to be a hat, but it couldn't be any old hat.


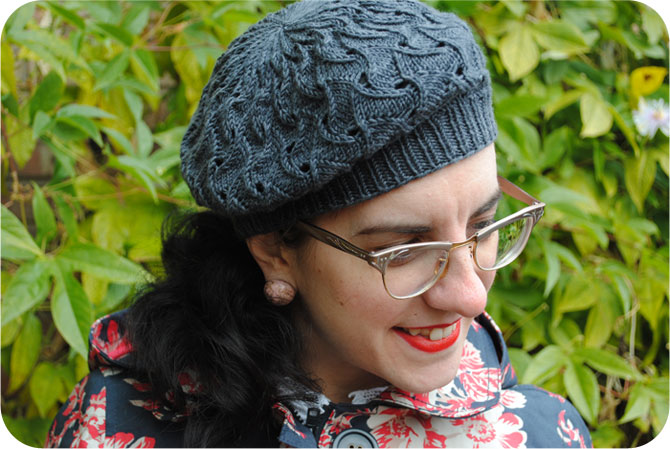
(Do I look like a lumberjill in this hat and the plaid shirt or what? Try taking photos for a winter hat when it's summer and the outdoors are all lush and full. So we'll pretend it's actually too cold to take photos outside, deal? This one's for my Australian readers who are dipping into winter!)

Now, I said this wasn't any old hat, so here's the story. Elisa isn't a huge fan of squirrels. She and her husband live a neighborhood over from us, and their street is much more tree-lined than ours, so they have a lot more squirrels than us. When I saw the new Squirrels hat pattern on Knitty, I knew that's what I was going to knit... with a twist.


Two out of seven squirrels say, "Ouch! Who dropped that &*^&%#$! acorn on my head?!"

Squirrel #1:


And squirrel #2:


How did I do it? I transferred the chart into Excel, and made a few tweaks. I turned the hands down, the ears down, and lowered the acorn. I wanted the eyes of the 'bonked' squirrels to be Xs instead of one knit stitch, so I omitted their eyes and stitched them on later. The hat is knit in the round but because of the two lowered acorns, I did those in intarsia. They're small, so I just twisted the yarn and carried it back to the beginning of the acorn in each successive row. That just took a little extra flattening when blocking.


When knitting a hat in the round, many people use a 16" circular needle. I hate small diameter circulars though, they make my hands cramp up. So I opt to split my stitches between two circular needles, as I've probably mentioned before. There are lots of tutorials online, but I think this is the one I used back in the day. It's an easy technique—a bit fiddly for the first couple of rows, so if you find it all flopping around, try putting a pillow on your lap.


This pattern uses fingering weight at 6.25 stitches an inch, well looser than I generally knit fingering weight at, but I kept true to the pattern (fighting the urge to re-work it at a tighter gauge, ha). The result is nice and springy and light. No complaints on the pattern either, it was very straightforward.

Now if you knit with two circulars at a looser gauge and with two colors, you may find the stitches between your two needles get loose and crazy looking. That's okay, because you don't want them super tight or you'll end up with a tight float between the needles and that can't be fixed. You can totally fix it if they're too loose, though.

Take a look at the difference blocking made below!

(Note: I realized the before and after were actually the opposite sides of the needles once I examined the photo,
but both sides looked the same, trust me.)

Moral of the story: block your knitting. It really does make a difference.

Anyway, I'm wildly thrilled with this hat. Oh, how I love novelty patterns!


And I also discovered I've been missing out on something. I've avoided beanie or toque style hats as I almost always have some sort of curl or roll in my bangs. What never occurred to me until this photoshoot was I could wear this style behind my bangs like I sometimes do with berets, especially if the hat isn't too tight as to crush my hair. This opens up a whole new world of hats for me in winter! There are plenty of cute vintage and modern winter ski cap patterns!

Worthy of an après-ski moment, no?


This hat has now gone on to live with its new owner, Elisa, but you better believe you'll be seeing more novelty hats from me in the future!


Monday, January 7, 2013

Why it's warm inside my boots

I love living in a four-season climate, but I don't love being cold. This winter I've been working on making myself warm in ways that don't make me look like a marshmallow. Don't get me wrong, I know there will still be some days I can't avoid looking like this. But I'm determined to look like the Michelin man as few days as possible this winter. As it gets colder I hope to do a post on how I'm layering to keep warm.

One trick I've learned to help keep the cold away from stocking- or tights-clad legs is socks hidden inside boots.

And now, my boots (this pair are Miss L Fire Havanas) hold a warm little secret tucked inside.


Because I knit wool ankle socks. Store bought cotton socks don't cut it when it's cold. Wool wicks moisture and retains heat at the same time.


Since no one can see them, why shouldn't they be pink and black stripes with silver sparkles?

Of course the answer is naturally, they should be.

(the silver sparkles kind of read as white bits in the photos, sorry)

Knitting socks is very satisfying. They're a great project to take on the go (even small enough to stuff in some vintage purses), they work up relatively quick even on tiny needles, and are good projects for confident beginners. There are tons of free basic sock patterns out there for every weight of yarn, and you'll even find sock patterns in many vintage knitting booklets.

The yarn I used was self-striping, so no extra ends to weave in to make all those stripes! Look online and you'll find tons of dyers creating self-striping yarn. For the ribbing, heels and toes I just used plain black, in a nylon/merino/cashmere blend because a) it adds a bit more warmth but mostly because b) that's what I had in my stash.


Remember if you plan to wear socks inside your boots, look for boots a half or full size larger than you'd normally wear so your feet aren't cramped. Maybe even bigger if you want extra thick socks.

Don't knit? Buy washable wool socks. It's hard to find ones that don't have a longer cuff, but they do exist, like these by SmartWool. Or simply fold the cuff down. If they tend to sneak back up, use tiny safety pins. If you can't quite hide them in your boots and are wearing dark opaque tights, try putting them on underneath, it may not be noticeable that way.


Don't suffer cold toes for the sake of vintage fashion! Frostbite isn't attractive in any era.

Stay tuned later this week for a free vintage sock pattern so you can quickly knit up your own!

Monday, November 12, 2012

Matching gray beret & fingerless mitts

When I was leaving for Rhinebeck back in October, I needed a small, portable knitting project. After all, I was headed to a sheep and wool festival, flying on a plane and doing some traveling by car, so I knew there would be knitting time.

I finished these fingerless gloves the weekend I was there. The pattern is Arctic Blast Mitts (Ravelry link), knit in dk weight so they work up fast.


Aren't they lovely? 

But I also needed a hat to match. I always say I look a bit like a hobo when wooly season sets in, with unmatched hats, gloves and scarves. Perhaps I should say it's boho, that sounds like I did it on purpose, doesn't it?

Anyway, you see why I needed a matching hat.


It being, well, me, I went for a beret.


The pattern is QL Slouch (Ravelry link) by Wooly Wormhead, a talented hat designer who recently came out with Classic Wooly Toppers, a book that looks to have several hats that the vintage knitters among us might enjoy.

The pattern was very simple and enjoyable. And while it was for a slouchy hat, I was able to block it into a beret using a dinner plate. (It's actually meant to be reversible if you don't block it into a firm beret shape.)


I did say matching, didn't I? By matching, I meant they really don't match at all, they just use the same yarn.


Both were quick knits, and already getting lots of use!


Any accessories on your needles this fall?

Tuesday, October 23, 2012

Sheep, alpacas and work

Well hello my friends! Long time no see! In case you were wondering if the earth swallowed me up whole, it did not. Not quite, anyhow.

Over the last month I was involved in a project at work that we've gone through each of the last few years which means pretty much working all hours I can manage for weeks leading up to the launch. I had no time for blogging, no time for knitting, no time for responding to emails, no time for literally anything but work for weeks, from mid-September through mid-October. It wrapped up a week ago, just in time for me to head out to upstate New York for a few days to attend Rhinebeck, AKA the New York Sheep & Wool Festival. Where I was so tired from all the work I could barely manage to take any photos, so I have precious little to share with you except a few Instagram snaps.

A sneak peek of the fair isle pullover I was able to block and seam up Thursday night before I left. I wore this Saturday and got lots of compliments!


Sheep!


And alpacas, and llamas in the background!


And fingerless gloves that I started knitting during my travels to Rhinebeck and finished up my last night at the hotel.


That's all I've got. I'm easing back into "normal" life again after a whirlwind month. Lots of correspondence to catch up on, lots of blogs to read, lots of knitting and sewing projects swirling around in my head (finally I'll have time to play with my new serger, yahoo!). Lots and lots to do!

I hope you all have been well!

Tuesday, September 4, 2012

Simple beauty of a steek in my fair isle knit

I sat down to do a post catching you up on our painting success after my retro fail living room post, but on the camera I found photos Mel and I took a couple of weeks ago when I was cutting the armhole and neckline steeks for my current fair isle project.

So instead, I just wanted to share with you the beauty you can find (or at least I can find) in knitting photos. A simple, traditional task in a fair isle knit, cutting a bridge of stitches in your knitting to open up an armhole, neckline or cardigan front, looks so serene and pretty when followed in just a few pictures. Well okay, maybe the scissors do look a bit scary.

Armhole before the snipping begins...


Snip, snip...


Armhole after the cut....


I'm (slowly) knitting plain red sleeves (the same red as in the body), out from the armhole with shaped sleeve caps, a method outlined well in Custom Knits by Wendy Bernard. I initially planned to knit the sleeves flat two at a time, but having just done that for my Knit It In Flag Colors pullover, I needed a change. That's just too many red sleeves knit flat, two at a time! So I switched it up for this one. I'm going slowly because I haven't had much time for knitting lately (too much planning on the home decor front), and because they're kind of boring.


Sorry, not much of interest for non-knitters in this post... hm, well, here's one tidbit: that's a vintage blouse I'm wearing (probably from the 50s, and I believe home sewn), with a delightful mini strawberry and diamond print. And it's reversible to pink on the inside. How clever is that!

Friday, July 13, 2012

Made and Making No. 4

Happy Friday! I know I never did post a Made and Making last Friday, but I was just too busy with my dad in town. So today's rendition wraps up a couple of weeks. There's a lot that went on in the Golly Ranch House that I'll talk about soon (small but important projects like replacing receptacles, and finding some interesting tidbits on prior wall treatments and tile in the house), but for now you'll get a couple of small tastes of what we've been up to.


{all images link to Flickr for full size}

Clockwise from upper left

1. New retro porch light. Oh good grief, was our light situation sad on our deck/porch. It was an old, rusted fixture with no globe and a bare light bulb under the covered portion (that I kind of think of as the porch), and then on the uncovered portion (that I think of as the deck, which is a couple of steps down), a huge honking fixture that was ugly. It looked like it could have been several decades old, until I looked closely inside and saw a tell-tale modern sticker. Its fate was then sealed when we saw the same one at Home Depot! Bye bye. So instead, we found this very cute, inexpensive light to replace the one on the porch and just ditched the ugly one. I'll show better photos later, but the upper edge is scalloped! What could be more 50s than that for our little ranch! And for only $20, it was a good deal, too.
2. Green skirt in the living room. I've really been wearing my bias-cut green skirt a ton. Here I've paired it with a Jitterbuggin blouse (same one in my blog header). I took a gamble recently and ordered some twill that had a bit of stretch to it to make a couple more versions, and it was a mistake. The stretch content is just all wrong for me. So I'll have to send it back and pick out something else. This is in our living room, which as you can see is still un-decorated. That rectangular white spot on the wall behind me is one of two glass block nooks in the living room.
3. Zinnia about to bloom. I decided way too late to plant the zinnia seeds that Mel's mom brought over this spring, but I had the seeds and a container so I went ahead. And they've been growing like crazy! They're now just about to bloom as you can see.
4. Freshly painted cold air return covers. Unexciting looking, yes. While my dad was here we were going to replace our cold air return covers, however the same size new ones actually ended up being about 3/4" too big, so it would have involved cutting the baseboards and base shoe. Instead of all that hassle, I scrubbed them down and sanded them to get rid of as much of the years of latex paint as I could, and spray painted them glossy white. They aren't perfect, but they look SO much better now.
5. Spiral cut hot dogs. While he was here, my dad saw a video on how to spiral cut hot dogs for the grill, so we had to try it. Fun! In this pic you can see a bit of our original 1950s half round display shelves in our kitchen, which are currently holding a bunch of my vintage Pyrex and my Juice-O-Mat. Eventually, we'll be swapping out these 90s/2000s counter tops for a more 50s look.
6. Red Queen sweater in progress. Yes, this is not my Unicorn and Lion sweater, but my Red Queen sweater. I mentioned it in my Coronation Knits blog tour post, and then suddenly had the urge to pick it up again after several months and I've been flying along.

Remember, this evening the Coronation Knits giveaway closes, so last call for entries!


Wednesday, March 14, 2012

VKC: Quick tip on un-knitting (and my work-in-progress)


Hello, hello! I'm sure you can guess what I've been up to lately. Right, more packing. Not an exciting topic of conversation, so let's move on. I grabbed a few minutes for a mini knitting tip. A tiplet, if you will!

Sometimes you have to un-knit part of your work-in-progress. It's often called ripping or frogging. Frogging is an onomatopoeia... "rip it...rip it"... get it? It stinks when you have to do it, because it means you've screwed something up. But it happens. There are a couple of good, basic, ways to do it...
  • One: Pull your knitting needles out, and rip out the yarn back as far as you need to go. The trick is then you have to insert your needle back into a row, and that can be hard to do without accidentally dropping stitches or losing your place in a pattern stitch or lace.
  • Two: Un-knit each individual stitch in each row. It's a slooow way to work, but can be helpful if you only have to go back a row or two, or you're working an in-depth lace pattern and you don't think there's any way you can pull your needles out and find your way back again. 
(Full disclosure: okay, so there are other ways to do this... you can insert a knitting needle several rows down and rip back to that, but it's almost impossible to do in a pattern stitch. If you used a lifeline, you can also rip back to that. But the two above are basic techniques that I think a lot of knitters use.)

I like a combo of both methods! Especially if I'm working in a pattern stitch. It's loads faster than un-knitting rows of work, and not as difficult as trying to rip a bunch of work and inserting your needle into stitches that are hanging out in space, hoping you can keep the stitches in pattern.

So here's my tip: Pull your knitting needles out, and rip back to one row before the last row you need to remove. If you need to remove 8 rows total, rip back 7 rows only. I like to count each row as I pull the yarn out so I don't go too far. Then I simply un-knit the last row using my left-hand needle, stitch by stitch, working left to right. Each un-knit stitch goes back on the left needle.


Once you've worked across the row, you have every stitch on the needle, exactly in pattern. Much easier than if you rip back completely and have to pick up those stitches that are hanging out in the air. Then all you need to do is continue knitting. Yep, that's it. It's a lot easier than ripping back to the row you need and trying to orient things in a pattern.

A pretty easy way to complete a task we all hate to need to do. :)


The pattern I'm working on here is So Neat and Sweet from A Stitch in Time vol. 2. I'm knitting it with Quince and Co. Finch, one of my new favorite yarns. I think this will be a great pullover for spring (which appears to have sprung early!). I'm picturing it with a nice patterned silk scarf tucked in at the neck, similar to the vintage version in the book. Though I'm woefully lacking in the scarf department, I definitely need to work on that!


Somehow in the middle of packing I've managed to knit the back and over half the front. It's a stitch pattern that was easy to memorize, so I don't have to sit down with a chart like my stranded pullover. I can just dive in. And right now, that's about all my head can handle.

The colors are a little off in these photos, but it's a nice buttery yellow. I think it will be a perfect staple pullover. Once we move and I dig out the sewing machine, I'm thinking a lovely 40s or 30s skirt. I believe I have some grayish blue gabardine... what do you think?


Anyone else knitting something from A Stitch in Time right now? I love the first volume, but I'm just adoring the new one!

Sunday, February 26, 2012

Sunday Pictorial Beret

I can't believe as I'm posting this, I've reached over 500 followers. Wow! I must say I'm incredibly humbled and flattered that there are that many of you who actually want to read about my mundane little life. :) I've been wanting to do a giveaway for this milestone, but being in the throws of moving, it's going to have to wait a little longer. Stay tuned!

Today I'm sharing my latest knitting project, a beret from A Stitch in Time Volume 2, Sunday Pictorial Beret (Ravelry pattern link). On a Sunday, no less. I can't believe I actually started and finished a project with everything that's been going on with the moving preparations lately!

But I'm not the only one with berets—in particular, this beret—on the mind lately. I know Stephanie of The Girl with the Star-Spangled Heart is working on the same beret, and Andrea of New Vintage Wardrobe just finished it, too.


I've had almost no time or energy to knit, and I've also been limiting my knitting as I'm having on and off shoulder and arm issues which knitting exacerbates (the issue is not gone but it's much better). But a couple of weeks ago I just got the urge to knit... something.


And I was inspired by a particularly wonderful photo from this woman in the 1950s in a striped red and white beret. (Love her polka dot gloves, too.)

{Source: Adore Vintage Tumblr | Daily Vintage Inspiration}

So I knit one for myself. Because you know I love my berets. This makes the third I've knit in 6 months (there's a vintage fair isle beret and a Halloween novelty beret, too).


Hats are often knit in the round, but this pattern is in garter stitch and knit flat and seamed, so it was easy to incorporate stripes. I just knit 2 rows in each color, carrying the unused color up the edge. (Seaming garter stitch stripes is a bit of a pain in the rump, but it's mostly covered by the bow anyway.)


I like it with this vintage Pendleton 49er (from Randolph Street Market last Fall).


I was on a bit of a red bender, if you can tell. I added a thrifted scarf, my favorite fakelite ring and handmade earrings I bought in Taos, New Mexico on vacation last year. The day was completely dreary so I just threw on as much of one color as I could, though I usually mix it up a little more.

(Incidentally this photo that reminded me I forgot to put on mascara. Whoops. I swear I always forget something.)


I don't really think of myself as much of a bows and frills kind of gal, but there was something about the bow on this beret I thought was really cute, and I just love it in stripes.


So I may not be knitting as much, or sewing at all right now (everything is packed up), but at least I now have a snappy little striped beret to carry me into Spring.

How would you accessorize a striped beret? I'm looking forward to playing around with it!

Related Posts Plugin for WordPress, Blogger...