Showing posts with label simplicity. Show all posts

Monday, July 1, 2013

Crazy for tulips skirt and blouse

I assume by now everyone who was using Google Reader has exported their feeds to another service like Bloglovin or Feedly? Today's your deadline if not, so you better hop to it! I exported my feeds to both of those services when I first heard about it, so I could play with them both. I decided awhile back that I preferred Feedly, partially because it included options to organize blogs into categories. I know you can do this with Bloglovin now too, so I might give it a try again. Options are nice!

Anyway, today's outfit is one of my favorites so far! And it was an accidental side effect of clearly having tulips on the brain.


You may recognize the skirt from the sneak peeks in my shaped and lined patch pockets tutorial last week! This is the skirt that my little tulip-shaped pockets made it onto. It's another version of vintage Simplicity 4496, the same pattern I used for my polka dot dirndl skirt.


But you'll see that the tulip shape of the pockets aren't the only tulips on the skirt!


I used a free transfer pattern from Needlecrafter for a Pennsylvania Dutch tulip and rose design, flipped it upside down to follow the curve of the shaped edge of the pocket, and omitted the roses. I love how it came out and I'm definitely in the mood for more embroidery!

My fashion fabric was a buttery soft, somewhat lightweight cotton blend twill from Denver Fabrics called fine line twill. Let me tell you, I love this stuff! I had a mixup where I thought it had a slight stretch content and couldn't figure out why it wasn't stretchy, then I thought it was 100% cotton, and then when I checked the site I saw it's an 80/20 cotton/poly blend. At $5.25 a yard, I highly recommend it. I think it would be great for trousers or capris!


But wait, the reason I was telling you about the fabric was the embroidery. I decided I didn't really need a stabilizer on the back of the fabric since it was a firm weave, but I did run into an issue on the front: I have a transfer pencil, but the pencil is red and it just wouldn't show up on the copper-colored fabric. So instead, I used Casey's great tutorial for embroidering on a knit sweater, and it worked a treat!

I drew my transfer onto tissue paper, drawing the upper curve of my pocket just to match things up neatly, and hand basted it onto the top of my fabric. For those wondering from my pocket tutorial, I actually did the embroidery on the pocket piece after attaching the facing (that's why you don't see a seam allowance above the curve in the photo below), although that makes no sense and I'm not even sure why I did that. So don't be silly. Just embroider first, then attach your facing. Your facing and lining will hide the back of your embroidery.


Embroidering like this was a breeze! Since I was doing two pockets, I actually stitched an area on both pockets before moving onto another area, to make sure my stitches were going in the same direction, etc. I used a combo of stem stitch, split stitch and French knots.


The embroidery kind of perforates the tissue as you go.


And then you just carefully peel off the tissue at the end and pick out the extra bits with tweezers!


I just love the results. It really turns a plain skirt into something more special!


And apparently I've been into tulips lately.

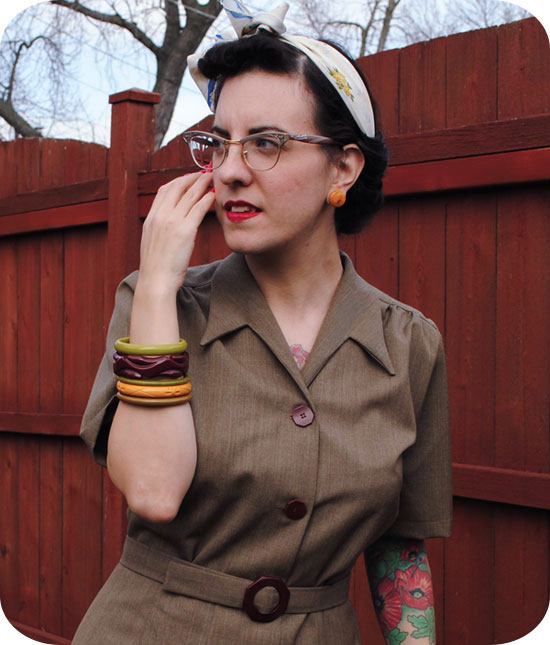
Over a month before our trip to the UK, I sewed up this blouse, and if you follow me on Instagram you saw me wearing it several times during our trip.


The fabric started life as a vintage feedsack, printed with delightful tulips.


In this next photo I see the facing is poking up on the right... I swear even after under-stitching (and sometimes after carefully tacking it down across the bodice front/back, not just the shoulders) this still happens to me. I loathe facings.


What I don't loathe? This blouse! This jubilant tulip print with red, gray and two shades of blue is one of my absolute favorites, I think, but it's just so hard to pick a favorite with feedsack. I want them all. Seriously.


Sorry I'm not sharing anything more about the pattern I used... yet! I'll just give you a little hint: it's not a vintage pattern, but a modern one that I modified. You'll hear more about it in the future, I promise!


After this skirt though, I think I'm temporarily over waistbands. I know you know that feeling, when you're working on a project and when it's done, you think, "Well that's about enough of that for the moment!"


So I think I may focus on some solid-colored blouses (perhaps with embroidery) to go with the amazing novelty print vintage skirts I never wear because I don't have tops to match. Now of course I have tops, but not ones I want to wear with them... you know how that goes. And I'm looking longingly at these wardrobe orphans and want to do something about it. Enough it enough!

Do you have a favorite vintage or 40s- or 50s-inspired blouse pattern you love?

Friday, April 26, 2013

My 40s gray wool skirt & feedsack blouse

As I mentioned in my last post, while I'm in bathroom-land I'm going to catch you up on some of the things I sewed towards the end of winter and beginning of spring! I think after this post I still have three things (with a possible soon fourth) left to show you, one of which may even result in a mini tutorial when I come back up for air in June after our trip.

What can I say, sewing has really become a big deal for me in so many ways, especially this year. And speaking of which, if you haven't already you need to go read Rochelle's beautiful sewing manifesto, especially if you are new to sewing. I just love the online sewing community!

Anyway, today I'm sharing a gray wool skirt and feedsack blouse, both from 1940s patterns I've sewn up before.


(Oh and hello, welcome to my step-grandmother's hutch. Remember how I said my mom and step-dad drove it across country a few weeks ago? You'll be seeing lots more of it, for sure! And yes, I still 'squee' every time I look at it, thankyouverymuch.)

I finished this skirt and blouse back in—my goodness, I think the skirt was completed in January and the blouse in February. I actually wore this outfit (along with my Curlicute cardigan) to the Chicagoland Vintage Clothing, Jewelry and Textile Show at the end of February, so Liz and reader Molly and her friend are the only ones who've seen it!

In fact I actually bought these shoes at that show. Navy blue heels from the 1940s, and pretty comfy. Swoon!


The skirt is a second version of Simplicity 2211 from 1945 (the first was my diamonds skirt), using a nice gray wool, lined with poly lining. I usually don't bother lining skirts as I wear slips, but I'm starting to come around to the idea of doing it here and there. This was the first one I did before moving to the wonderfulness that is rayon bemberg lining. The skirt is a little big, because I sewed it before discovering I was wrong about my waist size (it was just after this and before my pinafore skirt that it dawned on me), but with the belt I can cinch it in slightly.


Due to a boneheaded cutting error, I ended up having to piece together the waistband, with a seam strategically placed at the side seam of the skirt. Due to said same boneheaded error, I also had to do that with the belt. But while a seam in a waistband isn't the end of the world, you really don't want to see that on a belt! So wide belt carriers were my answer to that. (I'd call them belt loops except they aren't very loop-like.)

The seam of the belt is hidden exactly behind the back right tab. Pretty sneaky, huh? Boy was there some math to get that just so.


I think the first time I noticed similar belt carriers outside of Western-wear was about 6 months ago, on a 30s-style skirt from Nabby's Vintage Life. I loved her skirt so much I pinned it for safe keeping. While I was trying to decide if similar belt carriers would look nice on my 40s gored skirt, I encountered this circa 1940 Hollywood pattern online, and that sealed the deal!

{Source: Vintage Patterns Wiki}

I created my own little pattern piece to sew them. I find for fiddly things, pressing is way easier with a cardboard template inside. You can see the difference it makes below!


The top of the tabs are machine-stitched to the waistband, but my mom had a great idea for how to attach the angled part of the tab to the skirt: since I hand pick-stitched the lapped zipper, she suggested I mirror that in the tabs and pick-stitch them, too. I love it!


I couldn't decide on a buckle for the self belt, so I used a blue plastic vintage one and just tacked it down in the back with contrasting thread. That way I can easily remove it and swap it to something different if I'd like down the road! In the meantime, it's a swell match with this blouse.


The blouse is my first button-down made from a vintage feedsack, sewn using McCall 4820 from 1942. Can you believe how vibrant the colors are??


Now seriously, it's been a goal of mine since I started to sew again in 2011 to be able to make myself feedsack blouses, but the yardage is really skimpy on them (we're talking around 37" x 46"). I knew it would be next to impossible unless I had a very slim-fitting pattern. But once I sewed up my inspired-by-Debi blouse with this pattern, I suspected it might be The One. And I was right! You don't know how excited that made me! I have at least three other feedsacks lined up to turn into blouses now. Hallesewinglujah.

To figure out the cutting layout, I had to cut out doubles of all pattern pieces that required two and open up pieces on the fold, just so I could see it all placed out on the fabric together. In the end I can get every piece but an under-collar on one feedsack! So the under-collar is just muslin.


I modified the pattern pieces to have a straight hem instead of the westkit-style hem in the original pattern, but that's it, so this pattern has now moved into tried-and-true territory. You'll soon be seeing a third version recently completed in vintage fabric, and I could easily make a dozen more... and likely will! What can I say, I like winning patterns.

While I never explicitly meant for this blouse to go with the gray skirt, I think they make quite a smart pair!


Along with the vintage feedsack fabric, I used vintage buttons from my stash that just happened to match perfectly.


Overall I'm quite happy with the skirt and the blouse, and have worn both several times in the last couple of months. Both are great everyday pieces for me. I guess a sewist can't ask for more than that!


Thursday, February 7, 2013

Finished: Sew Grateful Week 1941 trousers

Thank you all so much for your lovely comments on my pinafore skirt! I actually can't quite believe I'm here 3 days later to post another finished sewing project. But friends, I did it. I finished a project for Debi's Sew Grateful week! Keep reading and you'll find out why these are for Sew Grateful, as there's a whole slew of reasons and people to thank!

Now, I managed to space out that Sew Grateful week was coming up until Monday when I was reminded about it on Debi's blog. Monday afternoon, I said, "Rats, too bad I don't have time to finish a project in time for Thursday's project day."

An hour later I was washing 4 different fabrics and trying to decide on a pattern and a fabric combo.

A few hours after that I was cutting fabric.

Tuesday night before bed I was prancing around in these.


Behold, my new favorite trousers, in lightweight corduroy. A totally appropriate vintage fabric choice and great for cooler months. (I'm pretending the blue is closer to cadet blue than it probably is, it was a very popular wartime color for women's clothing in the 40s.)


The pattern is Simplicity 3688, a reproduction pattern from 1941. If you read any sewing blogs, odds are you've seen at least someone make or talk about these trousers. Prevailing opinion is they're easy to sew and they're flattering.

And my opinion on the prevailing opinion? AGREED.


Because I intended to sew these faster than the speed of light I pretty much followed the pattern instructions to the letter. I think the only things I did different was to change the zipper application and to hand stitch the waistband shut on the inside instead of stitch in the ditch.

I also sewed one size down from what I would have normally after measuring the pattern pieces and realizing they'd be gigantic!


I love them. LOVE THEM. I'm totally making them again and again.


I did a centered zipper instead of lapped as I thought the fabric might be too heavy for a lapped zipper to look nice, so I took a queue from the Wearing History Smooth Sailing pattern. I have no idea where the instructions came from because I wrote them out by hand in my sewing notebook when I made my Smooth Sailing trousers, but wherever I got them, the results are great.

I love the vintage button that closes these. I have several more, so someday they'll make it onto another project. Though I may need to add a hidden snap on the inside of this pair to keep the button from meandering over the edge of the waistband.


I cut off about 3 1/4" off the length of the pattern from the bottom, turned up 1/2", then 2" again for the hem, and blind stitched by hand. I may do a folded up cuff next time but it wasn't in the cards with my tight deadline.


Now, here's the lengthy Sew Grateful elements!

I think I first saw this pattern when Debi sewed them, but have also seen them on the likes of Jane (twice!), Karen and Lauren over the last 2 years. I bought the pattern at some point after reading about them so many times, but hadn't sewn them yet. Fast forward to early January this year, when Rochelle personally recommended the pattern to me. That stuck in my mind and when I was trying to come up with a project, I remembered Simplicity 3688 and what she had said. So I owe a huge thanks to Rochelle for putting up with my last-minute emails about fit and sizing, these wouldn't fit as nicely as they do without her!

As for the fabric? I bought it during our Chicago blogger meetup last summer, with Liz, Lauren and Meg. That was such a wonderful day and I knew the fabric had to turn into something special.

Last but not least, I was inspired by several of the deadlines Debi herself has set for some of her sewing projects. I channeled Debi to get these trousers done and photographed in time! If you haven't been following her posts this week, you simply must go check them out. Her Sew Grateful project is stunning!

This project also marks a really important milestone for me: I've officially sewn more garments in 2013 than I sewed in all of 2012. I know. It's only February 7th. I think my sewing demons have been left behind for good. And I couldn't be more grateful for the online sewing community to help make that happen in so many ways. Tutorials, inspiration, friendship and support.

Thank you ALL!


(p.s. I promise you I haven't forgotten about knitting! ;)

Wednesday, January 16, 2013

Finished: 1940s Simplicity diamonds skirt & Alma blouse

Last week I completed my first outfit of 2013!


And yes, I planned and sewed an outfit! Let's talk about the blouse first.

I used the Sewaholic Alma pattern and sewed the size down from my full bust size with only slight changes: I make the neckline a little higher, graded the hips down (since I don't have a pear shape like Tasia's line is designed for), and cut 1.75" off the length. The blouse went together like a dream!

The pattern calls for an invisible side zipper, which I wanted to convert to a normal zipper to be more in line with a vintage blouse. But on my muslin I basted the side seam shut just to see if I could get myself into it without a zipper and I could!


I used fabric I had in my stash for awhile. I know I originally bought it for a blouse and it finally became one. I remember it was described as "linen look" but that's about it. Whoops. I think it must be a cotton/poly blend.

Look how nice my darts look! They never look this nice.


The blouse isn't exactly my typical style, but I didn't want it to button-down or have a collar as I suspected it would look like a waitress uniform. It came out looking a bit 50s/early 60s to me, especially in the pink, though you could make a case that it looks a bit like view 4 of this Hollywood pattern below. (If nothing else, my hair sure does!)

{Source: for sale by Aunt Nonnie's Nest on Etsy}

I could see myself using the great basic shape of Alma to draft something slightly different. I'm thinking a version with sleeves that are part of the bodice. I'm not sure what they're called, but they're like cap sleeves but not set in. You know the type, like in this 40s McCall pattern on Etsy or Collette's Sencha. Does that have a name? One of my hopes this year is to tackle this type of sleeve as it's always too big on my narrow shoulders but I love the look when I see it on someone else!

As for the Alma sleeves, those were easy to set in. It's often the point in a sewing project when I'm ready to chuck the entire thing out the window, except I sew in the basement so really I'd have to toss it out the basement door, which loses a little something in the translation. Not this time.


The skirt used Simplicity 2211, a 6-gored skirt that Vintage Pattern Wiki says is from 1945 (why don't Simplicity patterns have dates on them?!). The envelope is in terrible condition but it's marked on the flap as a "Truly Teen" pattern. Ha, not quite!


I used a vintage cotton from my stash. I don't wear a lot of pink but I really loved this diamond-shaped print. I was a bit nervous to use it as I think it was my first time cutting into nice vintage yardage, but I'm glad I did as the skirt is quite the showpiece for it, don't you think?


I went back and forth about whether to just make the waistband straight or go ahead with the scallop since it's such a busy pattern, but I went for it. In the end it would benefit from being worn with a more fitted blouse as when my shirt shifts around, it hides the scallop.

What a pain the scallop was, though. The waistband is one piece and you have to fold it in half lengthwise and very carefully sew the shape into just the middle, then clip and turn it, which is all nerve-wracking when you don't think you're that precise (like me).


By the way, I learned I'm anal enough to line up the placement of the scallop and the waistband with the pattern, and anal enough to match up the pattern on the patch pockets (which only 95% worked), but I'm not anal enough to match patterns on the seams. I barely squeaked it out of the 2 yards I had, so that's the excuse I'm sticking to. (I'll come up with something else next time I don't do it.)

Speaking of the pockets, those were my own creation... and you'll just have to wait for a special post in the near future to learn more about them! :)

@#$%$& I can see a bit of the blue tailor's chalk still!

Overall I'm pleased with the final skirt except for a minor issue. I ended up with a ripple at the top of my lapped zipper, but didn't realize it until after I'd completed the waistband so I wasn't going to rip it all back. For me the the underlap side (back) sometimes sucks up more fabric when being stitched to the zipper tape and makes it then not quite exactly the same length as the overlap (front) piece.

Fortunately it's a busy print. My lapped zippers still need a little work but it's such a great vintage technique. And who has ever said, "zippers, mine always look perfect!" Um, no one, I'm pretty sure. This one is hand picked, not that you could ever tell!


In the end, even though I made exactly what I set out to make, a matching outfit, I don't actually like that it's a matching outfit. But I tried out an idea and I'm glad I did. You never know until you try! And both pieces are a success on their own, so now I have two new separates to mix and match.

I'm already almost finished with another vintage blouse and have tons of ideas swirling about in my head, so I think I'm off to a good sewing start in 2013!


Monday, December 3, 2012

Completed: cake and vinegar dress

Hello everyone! Well let me just say a big humble thank you to everyone who enjoyed my back roll with a scarf tutorial. I'm so glad it's proved to be easy for others, and it's been fun seeing it crop up on so many heads. I forgot to mention another time it's a useful hairstyle: hiding when you try out a new setting pattern and you don't love the result. (I don't think you need to ask me to know how I found that one out.)

By the way, I've been drawn out of my Instagram hermit status by two lovely ladies, Land Girl 1980 and Fiercest Lilliputian, so feel free to add me @bygumbygolly. :)

♥  ♥ 

Tonight I'm happy to share my latest finished sewing project. This is the dress that prompted my pressing dilemma and subsequent pressing gratitude posts. Hence the "vinegar" part of the name, as that was the secret to pressing crisp lines in my fabric and saved this dress from the garbage heap early on.

The pattern is Simplicity 4992, from the 1940s. I liked the slim gored skirt and shirtwaist style, and thought it would make a good closet staple if I made it in a basic, solid color.


In other words, I wanted a "cake" dress! (Cake and vinegar dress, get it?) Those of you who sew may be familiar with the concept of cake vs. frosting in sewing (see Tasia's post here on the subject if not). Frosting refers to the fun and fancy stuff, while cake refers to the basics that we live in most days and need more of. I'm trying to round out my wardrobe, so I picked a sort of tan/beige/grayish wool-blend gabardine from my stash and went to it.

Of course, I had no idea that gabardine would be such a pain in the rear to press, or that I would never really be able to figure out how to attach the collar facing and the yoke (any words of advice, other than to be thankful it's hidden inside the facing and under the collar?). Pretty much right from the start I thought this dress was doomed.

But the problem is that I actually really like the final dress, even though it's not perfect.


Why is that a problem? Because that means at some point I'll want to make it again and then I'll have to figure out that yoke/collar thing and work out some other issues, most of which I didn't document well because I thought this was going to be a one-shot deal early on. So in the meantime, I'll just enjoy this one.


(You'll have to pardon the wonky lighting, the sun kept coming and going. And speaking of pardons, I clearly need to go back and re-press most of the skirt seams. I love the things you learn only after you photograph something...)

While taking photos, I noticed berries on a plant that didn't do anything all summer except be green. Exciting!


Like I said, the dress does have some issues. The back bodice could stand to be about 2" shorter and the collar isn't quite long enough in the back. I'm tempted to tack it down like Bex asked if I would.


I also think I may have set in the sleeves in reverse as I had to re-draft the them beause I cut about 2" off the bodice sides and shoulder, and I did it rather on the fly since I thought it would all turn out to be crappy, anyway. I know I'm my own worst critic though and would never notice it on something ready-to-wear. On the positive side, it features a great lapped zipper with my first time using a vintage metal zipper (I know, I know) and it was my first project using my new serger! I can only do one thing on it so far but I already don't how I lived without it.

Back to the bodice. This dress has me starting to wonder if, even though I'm a 36" bust and usually sew 34" bust vintage patterns, if I should instead be sewing 32" bust patterns and grading up the skirts, as they are often far too blousy on me up top. Short waist, big bust and vintage patterns with lots of gathers doesn't always add up well.


I love the buttons and buckle, which came from a vintage set still on the card. They're kind of a maroony-brown color that I thought would go with almost anything.


The belt was almost the end of me. I didn't have belting that was the appropriate width, so I first started by interfacing it to give it a bit of body, and then tried to turn it right side out. It was having none of that. About 45 minutes of my life later I threw it across the basement floor and started over. I ended up just hand-sewing it closed on the side that faces my body. I couldn't come up with anything else and I was so over this belt at that point that I'm lucky I finished it at all.


The fabric is a bit heavy and drapes well, and I think it'll be warm in winter but cool enough for spring and fall. It flows nicely in the breeze...


Frankly, it was a struggle for me to sew such a boring colored dress. If you're a fan of Retro Renovation, you might even think of it as "greige" in dress form. But I knew in the end it would be worth it, because it could easily be spruced up. I even had something in mind.


I have to say, it was worth the yawn-inducing color as I now have a dress that can go with virtually anything, most especially colorful knitwear.


In the end it was a project with lots of frustrations, but I learned some things along the way and it sparked a few ideas for the future. I'm pretty pleased with the final dress and I'm sure it'll get a lot of wear this winter!


Related Posts Plugin for WordPress, Blogger...