Showing posts with label sewing. Show all posts

Friday, August 23, 2013

Fall for Cotton: vintage fabric shopping, part 2

When last we met, I talked about hunting down vintage cotton fabric for Fall for Cotton, and discussed fiber content, condition and my thoughts on getting a good deal. Today, let's talk about the actual shopping part! That's the fun part! Well, sometimes it's the fun part... sometimes it's just annoying. Ha!


Where can I find vintage fabric shopping in person?

Flea markets, antique malls and thrift stores come to mind! Depending on where you go, where you live, the angle of the sun and if you're holding your nose and standing on one leg, you might find a great deal... or someone trying to hose you.

I personally don't get to hit thrift stores nearly as often as I'd like, so I can't really say I've had a lot of luck finding fabric there, but I know people have! As well as finding actual fabric yardage or remnants, don't be afraid to think outside the box when you're thrifting. Large cotton duvet covers, flat and fitted sheets, and pillowcases are all great sources of fabric! You can often find fun patterns or nice solids, and even novelty prints. And at most thrift stores, they'll be cheap! If you're looking for heavier fabric, drapery fabric can also be a nice way to go.

Now how about flea markets, antique malls and vintage fairs?  I tend to find better deals in booths where the seller isn't focused on linens. When I walk into booths where there are stacks and stacks of gorgeous old fabric, I know I'm probably going to walk out empty-handed. Why? I find those specialty booths tend to charge higher prices. Whereas the person selling a random assortment of goods is often more likely to have a good deal. Of course, this logic doesn't always play out as I've found linen vendors with reasonable prices, and also non-specialty vendors who want you to sign your life away in blood because they think what they have is so rare. So it pays to check everything! I'm just telling you how my own experiences tend to go.


Can I actually find vintage fabric online?

Totally! Although just like in person, it can be a hunt! Etsy and eBay are the biggest places to look of course. You can also get lucky finding a deal on TIAS and occasionally Ruby Lane, both of which are online antique malls.

In my experience, I find that there tend to be better and more accurate descriptions and better photos on Etsy listings than on eBay, but sometimes you may pay a little more for it. So it's up to you to decide how and where you want to hunt.

eBay seems to be a little more of a free for all, and narrowing down by keywords only gets you so far. While it can be a problem on Etsy sometimes too, I find way more eBay sellers using words like '1950s', '1940s' and/or 'vintage' when what they're selling is a modern reproduction (or just retro). It can be frustrating sifting through 350 Michael Miller prints. I'm not knocking Michael Miller, I love those fabrics! But when you're on the hunt for vintage fabric, that's obviously not what you're looking for. I find it's often a little easier to narrow results down to the actual items you're searching for on Etsy than on eBay, but your mileage may vary.

Tips:
  • Read the descriptions thoroughly. And don't be afraid to contact the seller with questions if the description doesn't answer them all! They're usually happy to provide you with more info. This is especially important if they don't mention whether or not there are stains or holes. Some sellers assume "vintage" also equals "some problems exist" without actually telling you what those issues are, and that's not cool. If there is any question, ask them. 
  • Look for listings that indicate the seller has actually looked at the fabric carefully and said something like "no apparent flaws noted" or "2 small pinholes 1 inch from the selvage". If there is no indication they've given it a thorough look, I personally won't buy it unless I contact the seller for more info.
  • Watch for "vintage" being thrown in as a keyword when it's not, in fact, vintage. Reading the description (or just looking at the photos) may show it's modern fabric.
  • Watch for the terms "reproduction", "repro", or "vintage style" to indicate it's modern and not vintage.
  • Unsure about the fabric content when purchasing online? I've had quite good luck in this regard and I'm almost always looking for 100% cotton, so I don't worry too much about it (see above about asking questions if you're unsure), but remember I do this hunt a lot. :) If you stick to looking for 1940s or 1950s cottons, you're much safer than if you are looking for 60s or 70s and later, as those decades were much more likely to have poly blends. You can always do a burn test (see my previous post), but remember only 100% cotton will work for this sew-along.


Be specific when you search online—really specific

Okay seriously, this point is so important it gets its own section! It's one of the crucial keys to the magical vintage fabric shopping online kingdom. Okay maybe not that important, but it sure does help.

Use specific terms and operators to your advantage when searching. Fabric is out there, you just have to find it! Take a look at this basic search first as an example: 

search terms: 1950s cotton 


Over 10,000 results, and notice they aren't limited to fabric, either. In fact, most are clothes (not including the sponsored search results in the first row of course). You can either put the word 'fabric' in there or limit your search results to the Craft Supplies category (left-hand column). I went the first route below.


That's better! But since there's over a thousand results, you can always limit it further. On both eBay and Etsy, you can use the minus ( - ) sign with a word so it does not get included. This is probably just as important as what you do want to search for!

search terms: 1950s cotton fabric -polyester -reproduction -repro -fat

Why '-fat'? That means no results will show up that are fat quarters, or a quarter of a yard of fabric, which is often used by quilters. (There's nothing wrong with them, they're just small, so not suited for full garments.) You can also add in the word 'yard' or 'yardage' if you'd like, although people don't always specify that in the listing. If the seller is unfamiliar with fabric, they might just give you the dimensions.

Maybe you'd like to get more specific with your search? Narrow it down to a particular color, or perhaps novelty prints, or holiday themes? Throw anything you like in there.

search terms: 1950s cotton fabric red novelty -polyester -reproduction -repro -fat


Now there's only 16 results for such a narrow search, but right off the bat I saw several I loved the looks of and would like to investigate. And at least one modern retro fabric, and a couple of household items, but that's to be expected.

And that's how it goes! Try narrower searches and wider ones alternately. Try a search that includes the word 'vintage' but then see if you get any better results specifying a decade. Use search terms like '1950s -50s' and then later '50s -1950s'... that will search for items where the seller used one way to write a decade but not the other. (By the way, these tips also apply to shopping for vintage clothing online... hint, hint!)

Think wisely about how you search and it may pay off in the end! Oh yeah, and it probably goes without saying, but be prepared for a major timesuck if you decide to start shopping for vintage fabric online. Ask me how I know...
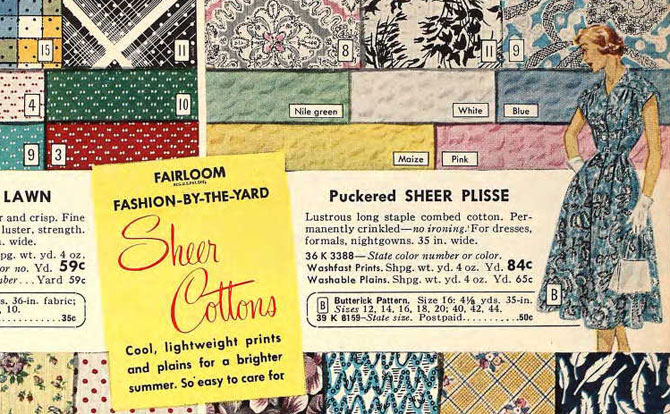
{Source: Sears Catalog, Spring 1954}


In the end, finding vintage cotton isn't too difficult, but it takes a bit of work to make sure you know what you're getting, and you feel good about the price you're paying and the quality of the fabric. Sadly we'll never have the swoon-worthy assortment of options available in decades past, but we can still get lucky now and again with a lovely piece of vintage fabric!

And don't worry, if vintage fabric isn't your thing or you'd rather go modern, Rochelle has a great post for you on shopping for modern cottons!

Do you have some vintage fabric hunting tips to share that would help out fellow Fall for Cotton sew-alongers? Please share in the comments or in our Flickr group!

Wednesday, August 21, 2013

Fall for Cotton: vintage fabric shopping, part 1

Are you thinking about your fabric choices for Fall for Cotton yet? I admit, I'm not quite yet, as I still have to figure out what I'm going to sew!

I know that at least a few of you in the sew-along are hoping or planning to use original vintage fabric. Since you know I sometimes use vintage fabric when I sew, I figured this would be a great topic to talk about. I have shopped for vintage fabric a lot, and while I'm certainly no expert, I hope my tips will come in handy for some of you sew-alongers!

{Source: Sears Catalog, Fall 1947}

Vintage fabric is just so swoon-worthy, isn't it? We all wish we had the myriad of options available then, but sadly that's not the case. Of course, there are reproductions available and plenty of retro prints, which are a wonderful alternative and especially great when you want a vintage look but with the assurance of modern durability, or just want to be able to go to a store and buying something off the shelf. (And trust me, speaking as someone who's spent more hours than she cares to admit sleuthing for vintage goods, that can be a mighty nice thing indeed.)

But original vintage fabric is still out there, too, and can be found! The prints, the colors... they set my heart a-flutter. For ease of care I lean towards modern fabric more often, but that isn't going to stop me from finding and sewing up vintage fabric whenever I can, while it's still around. :)

I'm going to break this topic up into two parts since there's a lot to talk about. Today, I'll cover fiber content, condition and getting a good deal. Next time I'll talk about shopping online and in person!


How do I know if it's 100% cotton?

The main issue with using vintage fabric for Fall for Cotton is that we're trying to limit ourselves here to 100% cotton. (By the way, if you asked any fabric content questions on either Lucky Lucille, here, or on Flickr, please see this thread Rochelle started in the Flickr Group for more clarification on fabric content, lining, etc.)

When buying vintage fabric, you might not know exactly what you're getting.


Sometimes it's pretty easy to know that what you have is cotton, and sometimes... not so much. But that doesn't mean you can't find out! You can do a burn test (please be careful!) on a very small snippet of fabric to find out more about the fabric content. Here are a few great places to start:
If it turns out your fabric isn't cotton or is a synthetic blend, that doesn't mean it's not wonderful! It just means you can save it for another great vintage project after the sew-along. :)


Am I getting a good deal?

Well, this is the subjective part. Just like vintage anything, what two people are willing to pay for the same item can vary dramatically. So I really can't answer that question for you. But what I can do is tell you how I think it through!

Decide how much you'd willingly spend on similar modern fabric. Take a cotton print, for example. Is your budget closer to $8 a yard or $25 a yard? Obviously that's a big difference. Then decide if you're willing to spend the same, a little more, or less on the equivalent vintage fabric. That's all up to you. And keep in mind that most pre-1960s vintage fabrics (and some later ones) are 36" wide vs. 44" or wider with most modern fabrics, so yard-for-yard you get a little less with the vintage fabric.

I sew with both modern and vintage fabrics. And I personally don't like to spend more on vintage fabric than I'd spend on modern fabric. I don't want the final garment to feel so precious that I never wear it, and I personally can start to feel that way if the supplies are really expensive! Of course there have been a few exceptions when I have fallen absolutely head-over-heals over something, but when I see $40 for 2 yards of vintage printed cotton (putting it at $20 a yard), no matter how awesome the print, I will walk away from it. But if $25 or more a yard is regularly your price point for cotton prints, then you might think differently.

Since I don't personally tend to like to spend a lot of money on fabric (see above comment about not wanting things to feel too precious!), I don't tend to spend a lot of money on vintage fabric, either. So think about your modern fabric spending habits and how you'd like that to apply to vintage fabric.

You don't have to spend a lot to get great vintage fabric, you just may have to be willing to put in a lot of time looking. I have found plenty of lovely vintage cottons in very good condition for under $10 a yard! Most recently, I bought this beautiful floral cotton on Etsy for $4 a yard. I may even have enough for a dress!


What about the condition?

Just like the price you pay, the condition of vintage fabric you buy is a personal decision. Are you willing to deal with a few stains or holes? There's a big difference between the light spots on the vintage cotton below on the left versus the 1 inch holes in the feedsack on the right:


The spots on the left are smaller than the head of an eraser and don't bother me (actually they look worse in the photo than in person), but the holes in the feedsack are much more difficult to work around.

Maybe you'll be more lenient on trouble spots if you thrifted it for a buck or two or got an awesome deal (like the holey feedsack), and less if you paid a little more? Or maybe you only want pristine fabric? You'll have to draw your own line in the sand.

I tend to be more forgiving about holes or stains if I'm shopping in person (and getting a good deal), because I can easily assess how easy or difficult it'll be to work around problem areas. Online, I much prefer to purchase fabric that has no noticeable issues. A seller's idea of a few "light" stains might be quite different than yours.

All in all, I've found plenty of vintage cotton that's in great condition with tons of life left in it. It just takes some work to find it!

{Source: Sears Catalog, Spring 1958}

In part 2 on shopping for vintage cotton fabric for Fall for Cotton, I'll talk about finding vintage fabric in person and online, with lots of tips especially for you online shoppers. And of course don't forget, you can use any fabric you want so long as it's 100% cotton, it sure doesn't have to be vintage! I just wanted to cover vintage fabric for those of you who are interested in using it. Rochelle will be talking non-vintage fabric soon!

Don't forget to join the Flickr group to check in with your fellow sew-alongers and keep tagging your Instagram photos and tweets with #fallforcotton!

Thursday, June 27, 2013

How to make shaped & lined patch pockets (with a few tailored touches!)

When I was working on my Sew for Victory jacket, I was quite tickled with how my lined patch pockets turned out, and I've used more-or-less the same technique ever since. It's based on tailoring methods for patch pockets. I can't claim credit for inventing these steps by any means, but like anything, I tweaked the process until I had a series of steps I really liked, so I wanted to share how I do it!

I love this method for so many reasons! There's no hint of lining poking out at the side of the pockets, it has a nice professional-looking finish on the inside, and the curves just come out nicer than some other methods I've tried that involve lining. Winner in my book!


Patch pockets are awesome. Cute, casual, fun on retro dresses, skirts and aprons, and super practical. You can make them in contrasting fabric, adorn them with embroidery, rick rack or more. They can be classy or kitschy, whatever your little heart desires! When I'm home it's often where I keep my cell phone and sometimes a measuring tape or keys, and when I'm wearing something without them, I curse and wish I had them.

The tutorial I'm sharing today results in a really nicely-finished pocket with a few little touches pulled in from tailoring. It has a self-fabric facing at the top part of the pocket inside, so you peek in and see the same fabric (especially handy if you're adding them to a gathered skirt, as they stick out open a bit!), and then lining fabric to cut down bulk for the rest of the pocket. It's all created in a way that makes sure the lining doesn't peek out on the right side. Finally, while you can topstich the pocket in place, I'm going to show you how to invisibly slip stitch it onto your garment. So let's get to it!


  • paper and pencil for tracing
  • fashion fabric for pocket and facing
  • lining fabric (rayon bemberg, poly lining, or lightweight cotton like voile or batiste all would be good choices... but if you're going with contrasting for fun, why not try a cute cotton print?)
  • interfacing of your choice


First off, you can either use pocket pattern pieces from your pattern of choice or create one yourself!

Inspired by a few 1940s and 50s patterns (most recently this New Look sundress pattern), I went with tulip-shaped pockets and drafted the shape freehand, tracing it onto tissue paper. I used the children's method of drawing a heart: I folded the piece of paper in half so each side was the same.

If you create your own pattern, just keep in mind your seam allowance so you don't accidentally make it too small. I used 1/4" as my seam allowance. And for reference, the width of my pocket piece was about 8" and the height about 8 1/2".


Once you have your pattern piece cut out, create a piece for your facing, which will be at the top of the inside of your pocket. I just created it by tracing from my pocket piece.

The facing can be as deep as you'd like, but at least 1 - 2" or so (not including seam allowances) is a good starting point. If your pocket is shaped with a big curve or two like mine, make sure that length extends below the lowest point of the curve like I did.

Don't forget to add your seam allowance at the bottom. This is where you'll sew the facing to the lining.


Time for your lining piece. The lining piece will be the size of your pocket less the size of the facing piece, plus a seam allowance. Make sense? Both the facing and the lining have a seam allowance since you sew them to each other.


But wait, here's the most important part!

You can do this when you cut your facing and lining piece or after, but don't forget: trim about 1/16" off the outer edges of your lining and facing pieces. They should be just slightly smaller than your main pocket piece. This means you'll have to slightly stretch your facing and your lining pieces when sewing to the main pocket piece, but it's the secret to the no-show lining and clean finish on the edges of your pocket. I promise!


Now you can cut out your pieces. Cut your facing and main pocket pieces from your fashion fabric, and cut your lining piece from your lining fabric. A tip I learned from Liz and have since seen Sarai from Colette Patterns recommend when using silk: if you choose a slippery lining fabric like I did, use a fabric stabilizing spray to tame that bad boy. Trust me (and them), it's genius. Genius!

Almost assembly time. First though, I added about 1" of fusible weft interfacing to the upper edges of my facing piece to help the pocket not stretch out over time. I caught it in the seam allowance, but if you have heavier fabric and are using fusible, you may want to trim it clear of that.


Now, assembly! With right sides together, pin your facing to your pocket piece like I did already above. You should only have to stretch the facing ever so slightly when pinning it together. Using whatever seam allowance you established (1/4" for me), sew only the shaped top edges together, not the sides. Press, trim and grade your seams, clipping inside corners closely but without clipping into your stitch line. (I totally didn't grade my seams.)

(Sorry this is a blurry photo, it was the only one I got of this step.)


Pin the lining piece to the facing piece, right sides together. Leave at least 3" open at the very center. This center opening is how you'll turn the pocket right side out at the end.


Sew the seam on either side of the opening.


Trim and press the seam towards the lining, including over the opening. It'll make it easier to close it up at the end.

(Note: you'll see below I actually had pressed the curved top edge at this point, though it's not necessary to do it yet.)


Time to sew the lining/facing side to the pocket side, which will close up the pocket except for that opening. Right sides facing, pin it all together, carefully stretching the lining to get it to fit the pocket. I like to pin the sides of the facing first, then the center bottom of the pocket, and then go up each side, stretching carefully. It may take a bit of work, so lots of pins will help keep everything in place. When it doubt, hand baste after you pin!


It's almost impossible to photograph, but at the very upper edge where you sewed the pocket and the facing together along the curved edge, when you're pinning it, just slightly roll this seam towards the facing side. This will make certain that when your pocket is right side out, the seam isn't peeking out at the upper corners.


 It may help to see what this looks like once you've sewn it, to clarify:


After pinning, your pocket will curl up slightly off the table because the lining side is slightly smaller. Don't worry, this is exactly what you want to see!


Now, starting at the top edge of your pocket, sew down, around and back up to the other side.


Trim your pocket seam allowance, and clip around your curves, either snipping into or taking out little triangles... I snipped this time. Press the lining seam allowance towards the inside of the pocket lining (I don't bother trimming the lining seam allowance).


At the very top edge where the facing and pocket meet, clip that seam so that you can press the facing towards the inside of the pocket, too, and trim that seam close to the stitch line for a crisp point.


Through the hole that you left open earlier, turn the pocket right side out carefully. Yep, it'll look like a mess for a little bit.


With a finger or two inside the pocket opening, gently poke your curves into position. Because of all your careful prep work, this should actually be pretty easy, unlike other methods where I've sometimes been cursing up a storm at this point because my "gentle curve" is more like 6 or 7 little flat lines. That's in part because your lining is a little smaller, so those seam edges won't show on the front at all, so everything just naturally rounds itself out in a much more civilized fashion. No cursing necessary.

See how the seam favors the back and not the front of the pocket at the top edge? That's because you rolled that edge towards the facing side when pinning. Use a point presser (knitting needles work too) to coax your points into position at the top of the shaped edges.


Gently press your pocket to set everything into position. You'll notice when you do this that the pocket fabric rolls towards the lining side a bit just like I said it would. No peekaboo seams for you! Pretty nifty, especially if you're planning to use a contrasting lining fabric!


Oh, don't be an idiot like me: once you're done admiring your work, close up that hole you left on the inside right now, or you'll be trying to jam Steam-a-Seam Lite into it when it's pinned and already halfway sewn onto your garment...enough said.

Now you should have a nicely curved, professionally lined and faced patch pocket!


(This is the point where you might be saying, "But wait, that's embroidered and you're almost done with the tutorial and you haven't even mentioned it yet...!" You'll just have to wait until I show off the final garment to hear more about it!)

Pin your pockets to your garment. Feel free to use topstitching to attach it to your garment if you'd like, or invisibly attach it with slip stitching like I did. Here's how.

Starting at the upper corner, take your threaded needle through the inside edge of the pocket, so you can't see it from the front. This also buries your knot on the back of the pocket and not inside your garment, in case you're particular enough that it would matter to you... I do this by habit, not because I'm that particular. ;)


Take a tiny stitch through the garment fabric with your thread and needle. Continuing to keep your stitches juuuust on the inside of the pocket, tack in place a few times at the corner for stability.


Then carry along the edge of the pocket, taking small stitches through the inside edge of the pocket and the garment below it, all the way around. Really make sure the stitches are small so you've got the pocket nice and attached to your garment. Don't pull your thread too tight or the pocket will pucker. I like to take a few stitches, then very gently tug on my thread to snug things up. (I do the same thing when sewing together knitting, by the way.)


When you get to the other corner make sure to take a few stitches for security, and knot off. You're done, and now have a pretty professional looking, adorable pocket on your garment!


And when you take a peek inside the pocket, you'll see the self-facing and your lovely lining. Nifty, huh?


Hope you've enjoyed this tutorial. It's one of many ways to create patch pockets, but it's a nice method to have in your sewing arsenal, I think!


Interested in seeing more of the garment my pockets made it onto? I'll be sharing it soon! :)


Tuesday, June 4, 2013

My guest post today on The Refashioners!

Hello my friends, it's been some time! We're back from our long trip to the UK. Lots of fun was had, I even got to meet a handful of amazing blogger friends, and pictures of our trip will happen soon once we've settled back in (and taken care of a few remaining bathroom remodel-related things). But most importantly today, pushing through the jet lag, I have something fun to share!

Remember how I told you I was selected by the lovely and talented refashioner Portia to participate in her 2013 Refashioners project? Well she kicked off two weeks of guest post refashions yesterday. If you haven't seen yesterday's post showing what Karen from Did You Make That? refashioned, you had better go take a look, it's pretty amazing (oh and she was one of the wonderful people I got to meet on my vacation!).

Today, my refashion is up on Portia's blog! Just what did I do? I took a huge men's flannel button-down, long-sleeved, collared shirt and turned it into a vintage-inspired skirt! (All in the midst of the bathroom remodel, which I can't even believe on hindsight!)

I haven't done a lot of refashioning in my time, so this project really was a challenge. But I'm pleased as punch with the results and seriously want to start scouring thrift stores for similar shirts because I love this skirt. If you haven't dabbled in refashioning yet, I hope this makes you give it another look. It sure made me!


Want to learn more? Pop on over to Portia's blog and read all about my refashioned skirt today. And be sure to follow her blog to see all the other refashions coming up over the next two weeks!


Friday, March 29, 2013

Now for something completely different... The Refashioners!

Well everyone, I am overwhelmed by all your wonderful comments on my Sew for Victory jacket on my blog, Twitter, and Instagram. It's really tickled me to have that project complete and share it with all of you. :)

And today I have something completely different to share with you!


You may have seen it on a few other blogs already, but the refashioner queen, Portia, is running another Refashioners challenge this spring, and I've been asked to participate!

Here's the awesome lineup for The Refashioners 2013, which starts June 3rd. I am so excited to be included with these amazing sewists!
Karen Did You Make That?
Zoe So, Zo...
Dixie Dixie DIY
Marie A Stitching Odyssey
Joanne Stitch and Witter
Lauren Lladybird
Tasha By gum,  by golly!
Elisalex Stitch Me Softly and By Hand London
Sally Charity Shop Chic

Now as you know I am not a refashioner by nature, I am much more comfortable working with fabric and a sewing pattern from scratch. But that's part of the challenge! Some of the participants are regular refashioners, and some are not. I really admire people who can look at one garment and see past various size/fit/color/etc issues and turn it into something else that's completely marvelous. (Have you seen some of the things Portia does?!) This will be my chance to see what I can come up with!

When my garment wings its way across the world to me, I'll be sure to share it so you can see what I'm up against... hopefully Portia is kind. ;-)

Stay tuned for more on The Refashioners 2013!


Tuesday, January 22, 2013

My guest post on Lucky Lucille (with those pockets!)


Hi everyone! I'm happy so many of you enjoyed my latest sewing projects. And as I promised, I have a little something special up my sleeves for you. Well, in my pockets, I guess!

If you'd like to learn more about how I did the pockets on my vintage skirt, then pop on over to Lucky Lucille for my guest post today. I adore Rochelle and was thrilled to contribute to her fabulous blog while she's doing a WWII reenactment. It's not exactly in a true tutorial form, but I talked about everything I did to create those fun pockets so many of you loved, so you can try it out if you'd like, too.

Go check out my guest post! (And thanks, Rochelle!)


Thursday, January 3, 2013

Trying things that don't always work out

Hello my friends! And a very happy 2013 to you. I'm marching right into this year, full steam ahead.  I have two new knitting projects on the needles, and a stack of sewing projects I'd like to start.

In fact, I've already learned something about sewing this year: ideas that sounds brilliant in your head don't always translate to a project the way you expect them to. And I'm having to remind myself that's okay. I'll share more soon but in the meantime I'll give you a little taste. It involves that pretty fabric on the top of the stack below. It'll be fine, just not exactly what I was picturing in my head.


I think the moral of the story is sometimes you just have to try something to know if it'll work out. The best laid plans and all, right? This was an idea I had kicking around in my head for months, but now that I finally sat down to start it, it's turning out to be more trouble than I think it's worth. But I'm glad I tried it, and in the end I'll have at least one coordinated outfit in my closet. Plus, if I'd never tried it I would have kept on planning and wasting brain space that can now be spent planning something else. Yahoo, right?

Have you learned any lessons when you tried something new in a project that didn't quite work out?

Tuesday, November 6, 2012

Trying to find inspiration for fall & winter

My American readers, are you voting today, or did you early vote? Yes? Good. Moving right along...

Cold weather is setting in. And I've found myself absolutely floundering style-wise this fall! Being inspired by knitting projects but not sure how they'll fit into my wardrobe. Being inspired by certain vintage fashions but feeling very ho-hum when wearing them myself. Being inspired by other vintage fashions but not if the styles will work for me. Wanting to sew more of my wardrobe but not really sure what I want to be sewing and wearing. Not having any idea what would be appropriate fabric to sew with for fall/winter, other than wool. I'm such a fan of wash and wear fabrics like cotton (wool being an exception), as well as the accompanying prints. Satins, silks and chiffons don't usually do it for me, even when brightly colored. Hell, right now I can't even decide if I want to cut or grow my hair. Help, I'm style paralyzed!

So let's break it down. Fair isle sweaters and tweedy A-line skirts are always a winner in my book (not that I have enough of either). But right now I'm also drawn to big floral-print dresses (not that I can find any fabric that fits the bill), brightly-colored cropped cardigans and belted sweaters (oh but my belt collection is shabby!), and more full skirts, pencil skirts and cinched waists than I have leaned towards in recent memory. Perhaps I'm wanting the bright and lively colors and more defined lines and styles to punch up the dreary weather that's setting in, especially as our house doesn't get a whole lot of natural light as it is! But almost none of these are things in my current wardrobe, so there would be lots of work ahead of me in the sewing, kniting and hunting departments. One step in the right direction: I'll be following along with Tuppence Ha'Penny's pencil skirt sew-along to make a lined pencil skirt. (And no, I haven't decided on fabric yet. I'm sure you're surprised, given the nature of this post.)

While I sort myself out, I'll leave you with a few little goodies from my sewing pattern files as inspiration for your sewing...


Sources: Advance 3659, Vogue 6329, Advance 5117, Hollywood 1200, Simplicity 4992

Any of these strike your fancy? What would you do to make them fall or winter appropriate? Where are you finding inspiration right now?

And a p.s. for those of you who expressed interest in a knit-along—I'm still definitely thinking about it. I have a couple of projects I want to finish up first that will probably take me through the next several weeks. That will give me some time to plan. Any ideas welcome!

Thursday, September 20, 2012

Weekend blogger meetup (& other recent activities)

Hello! Before I get started with documenting a little adventure I had this past weekend, I wanted to say a big, huge THANK YOU for all of the wonderful comments I received on my last post. Wow. It's so nice knowing you're not alone, and all of your personal stories have been so great to read, and I hope helpful to others, too! I've been extra busy the last week and my plans to respond to each comment on my post or by email has not happened yet. We had a jam-packed weekend of activities as you'll see below, and have also been closely watching our pets, who are recovering from big dental surgery they had recently. They've had a few ups and downs, but seem to be doing well now, thank goodness.

♥  ♥  ♥

Saturday's big activities? A big, fun blogger day here in Chicago!

Lladybird, (AKA Lauren) was in town, up from Nashville, and wanted to have a blogger meetup. She put out the call, and we answered. Liz of zilredloh.com, Meg the Grand, Nancy of Buddha Bear Studios and I met up with her for brunch and to do a little stash swapping. I wish I had taken photos (Liz has one on her roundup of the day), but the table was full of knitting and sewing pattern carnage. It was hilarious. Really, the table was piled high! We actually had to stuff things in corners of our seats and bags in order to make room for food. There was everything from 1940s dresses to clown costumes. I made out with a few Stitchcraft knitting booklets, and was able to unload several of my own vintage knitting booklets and sewing patterns (more stash out than in, yay!).

Afterward, Nancy had to part ways but Lauren, Liz, Meg and I went on a crafty shopping adventure of the first order. Mind you, this was all pre-planned by Liz. And amazingly so. She even had bottles of water for us in her car and a treat (more on that later), for when we got famished from shopping!

Where did we go? Two ginormous sewing emporiums that Liz frequents, that neither Meg nor myself (both locals) had ever been to. I admit, I do most of my fabric shopping (and really all kinds of shopping) online. Especially in large fabric stores I easily get overwhelmed. This was perfect because I was armed with sewing buddies who were able to keep me on track. And we were having so much fun I didn't even have a chance to get overwhelmed!

The first stop was Fishman's Fabrics, a 1,000 square foot shop that's been around since 1903. Mel's mother remembers her mother-in-law taking her there in the 70s or 80s. If you've go to their web site, yes, the shop really does look like that. Scary big, isn't it? Not so scary from the outside, though.


I really wasn't a very good photographer that day, so I have no shopping photos, but I did snap a few by this fabulous wall of framed photos and letters in their entrance way. Here Meg and Lauren are checking out a letter from Ann Landers...


Here it is close up. Can you imagine typing a letter to a fabric store, requesting fabric based on a swatch? My first thought was it looked like something for Cruela de Vil...


From left to right that's Meg, Lauren and Liz decked out in handmade clothing!


I loved this photo too, take a look at that skirt!


We spent a long time in Fishman's, and Liz knew we'd need some sustenance to get us through our next stop. OMG, she baked us macarons!!


Yes, that's a tupperware full of two layers of the yummies macarons EVER. She even brought along ziplocs for leftovers for each of us. Amazing!


I totally love that we munched on them in the parking lot, too. Meg has a photo of us all eating them with UPS trucks behind us. Ha!


They were so good, Meg had to have a private moment with one of hers...


And wasn't everyone dressed so cute? I loved Lauren's dress...


And look at the double scalloped hem on Liz's skirt!


After Fishman's (where we all managed to not buy anything—it is huge but quite spendy) we went on to Vogue Fabrics, where the real shopping began. Apparently by this point I was so engrossed in shopping I never took another photo, aaargh. But be sure to check out everyone else's blog for pictures. There are lots of good ones from Vogue. We all left the shop with big bags of fabric, and I think we got some pretty good deals, too!

With fabric shopping completed, we went to Loopy Yarns for a bit of yarn shopping, and then finished the day with a beer (cider for Meg and I) at Hackney's, both in Printer's Row. It was such a wonderful day! I really had a blast. It was awesome to hang out with these wonderful crafty ladies!

And while not a sewing adventure, Sunday Mel and I met Lauren and her boyfriend Landon and Liz and her husband Felix at the Vintage Garage, a vintage-oriented flea market of sorts. Once again I sucked at taking photos there, so you'll have to pop over to Liz's blog for her roundup post. We also saw Leilani the Thriftaholic there looking lovely as always. She was taking photos of the event, so be sure to check out her blog soon, she always does amazingly detailed photo posts of the markets she attends! Look for a post from me soon about breathing a bit of new life into a Danish modern bowl we bought there.

And one last activity to mention, the weekend prior was Renegade Craft Fair and the Vintage Bazaar (which did a pop-up market at Renegade), where we shopped around with Liz and Felix. A woman asked if she could take a photo of Mel and I, since Mel was carrying a bag from Krrb, which we were given when we bought a set of vintage highball glasses (I'll have to show it to you soon!). I'd never heard of Krrb before, but it's a place to help people buy/sell secondhand things local to them. I'm all for more of that.

{Source: Photo compliments of Krrb.com, photo by Meg Goldberg}


Well there you have it, my rather poorly-documented last couple of weekends of fun activities! I came home with several fabric goodies from Vogue on Saturday, one of which has already been sewn up into my very first pair of trousers. (Yes, already!) I hope to take photos of them soon. They definitely aren't perfect and the fabric had me running into a series of challenges along the way, but they got me over my fear of sewing pants. Yay!
Related Posts Plugin for WordPress, Blogger...